
One of the perks of the Growing Places Teaching Garden program is the opportunity to earn a free raised bed garden installation. Yep – the whole thing from lumber and hardware to soil and amendments gets brought straight to our gardeners’ homes and installed with the help of local volunteers. Pretty great, right?
But what if you’re not in our program? Or what if the garden we installed needs a replacement or additional bed? Maybe you’re looking to pull off a garden installation of your own. Well, we can help with that, too!
We’ve recently revised our method for constructing simple, 4′ x 8′ wooden raised bed frames and wanted to share. These are the directions for the construction novice. There’s no need for a basement workshop here, just a power drill and probably one other person to help you hold things steady. We’ve had numerous high school volunteer groups knock these frames out in no time flat, so don’t be intimidated by the project if you’ve never attempted anything like it before. It’s a great beginner project.
Instructions for Building a Raised Bed Frame
Once you have your desired number of frames, to install them the GP way, you’ll want to line them with a weed block. This can be as simple as 3-4 layers of newspaper end to end, or plain brown cardboard (not corrugated, which has glue), or, if you want to invest in it, use a permeable landscaping fabric. Be sure not to use straight plastic. Water won’t be able to flow through it and you’ll find you’ve created miniature swimming pools rather than a garden. Be advised, tomatoes can’t swim.
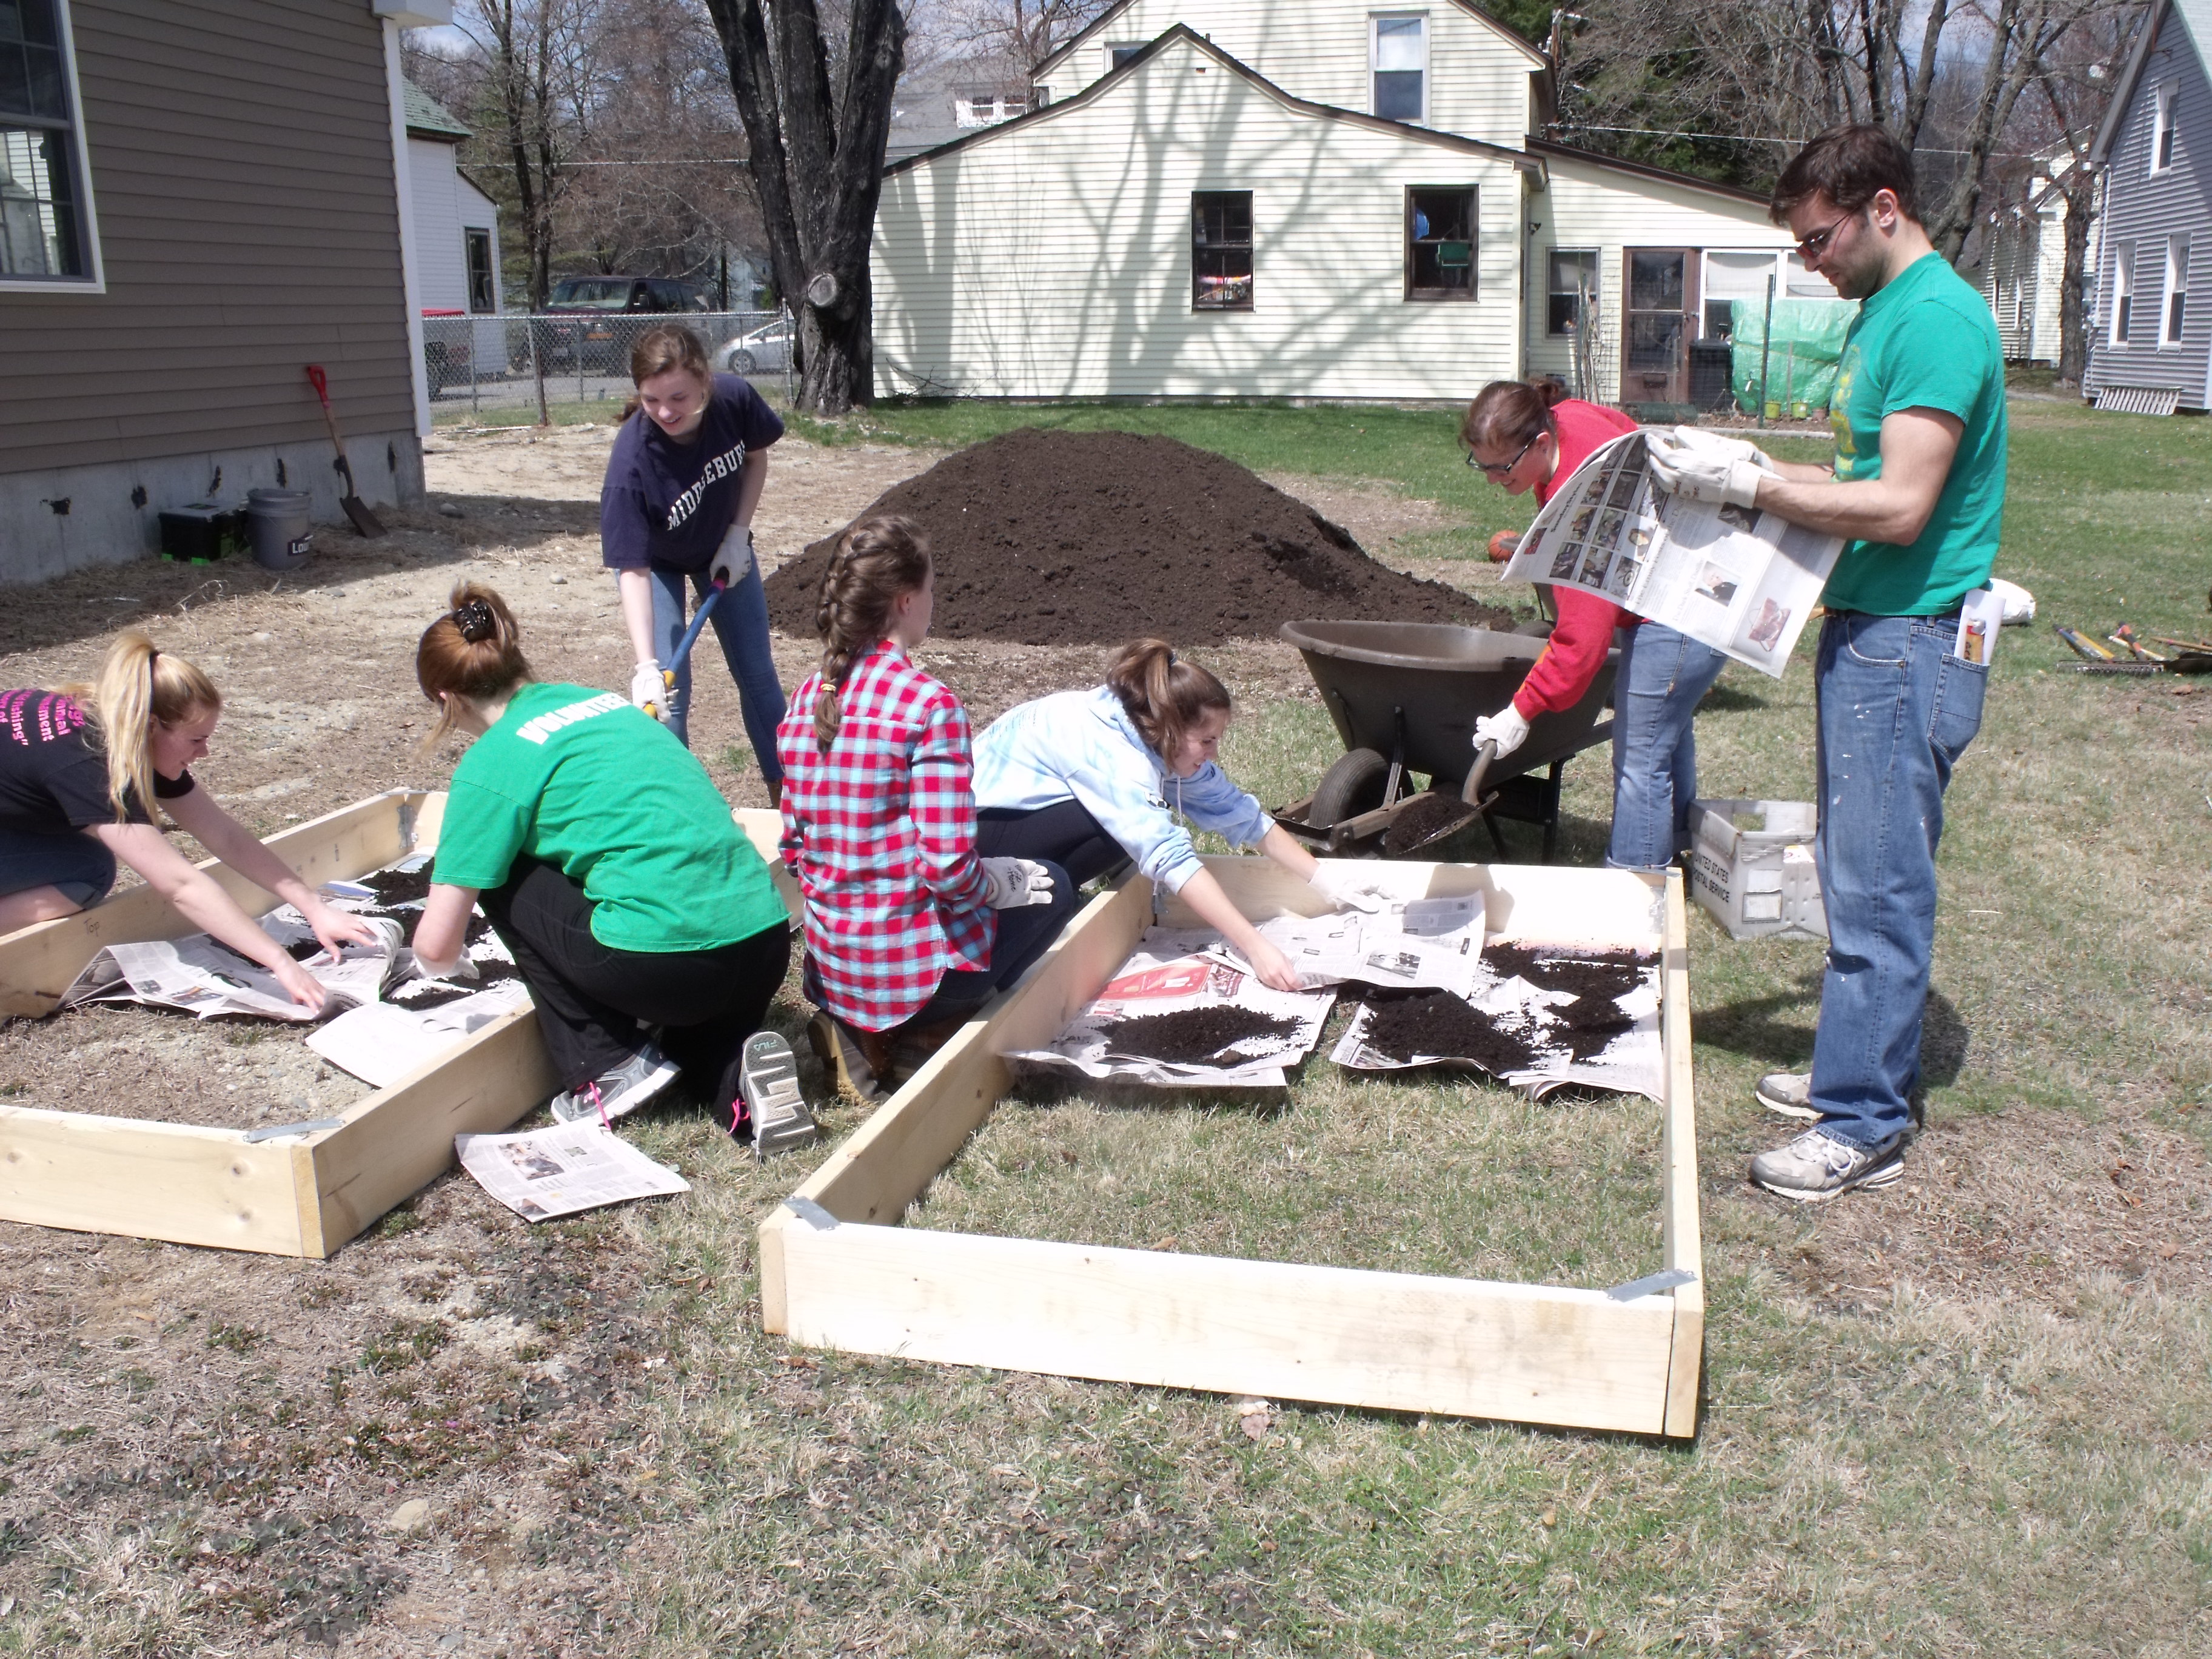
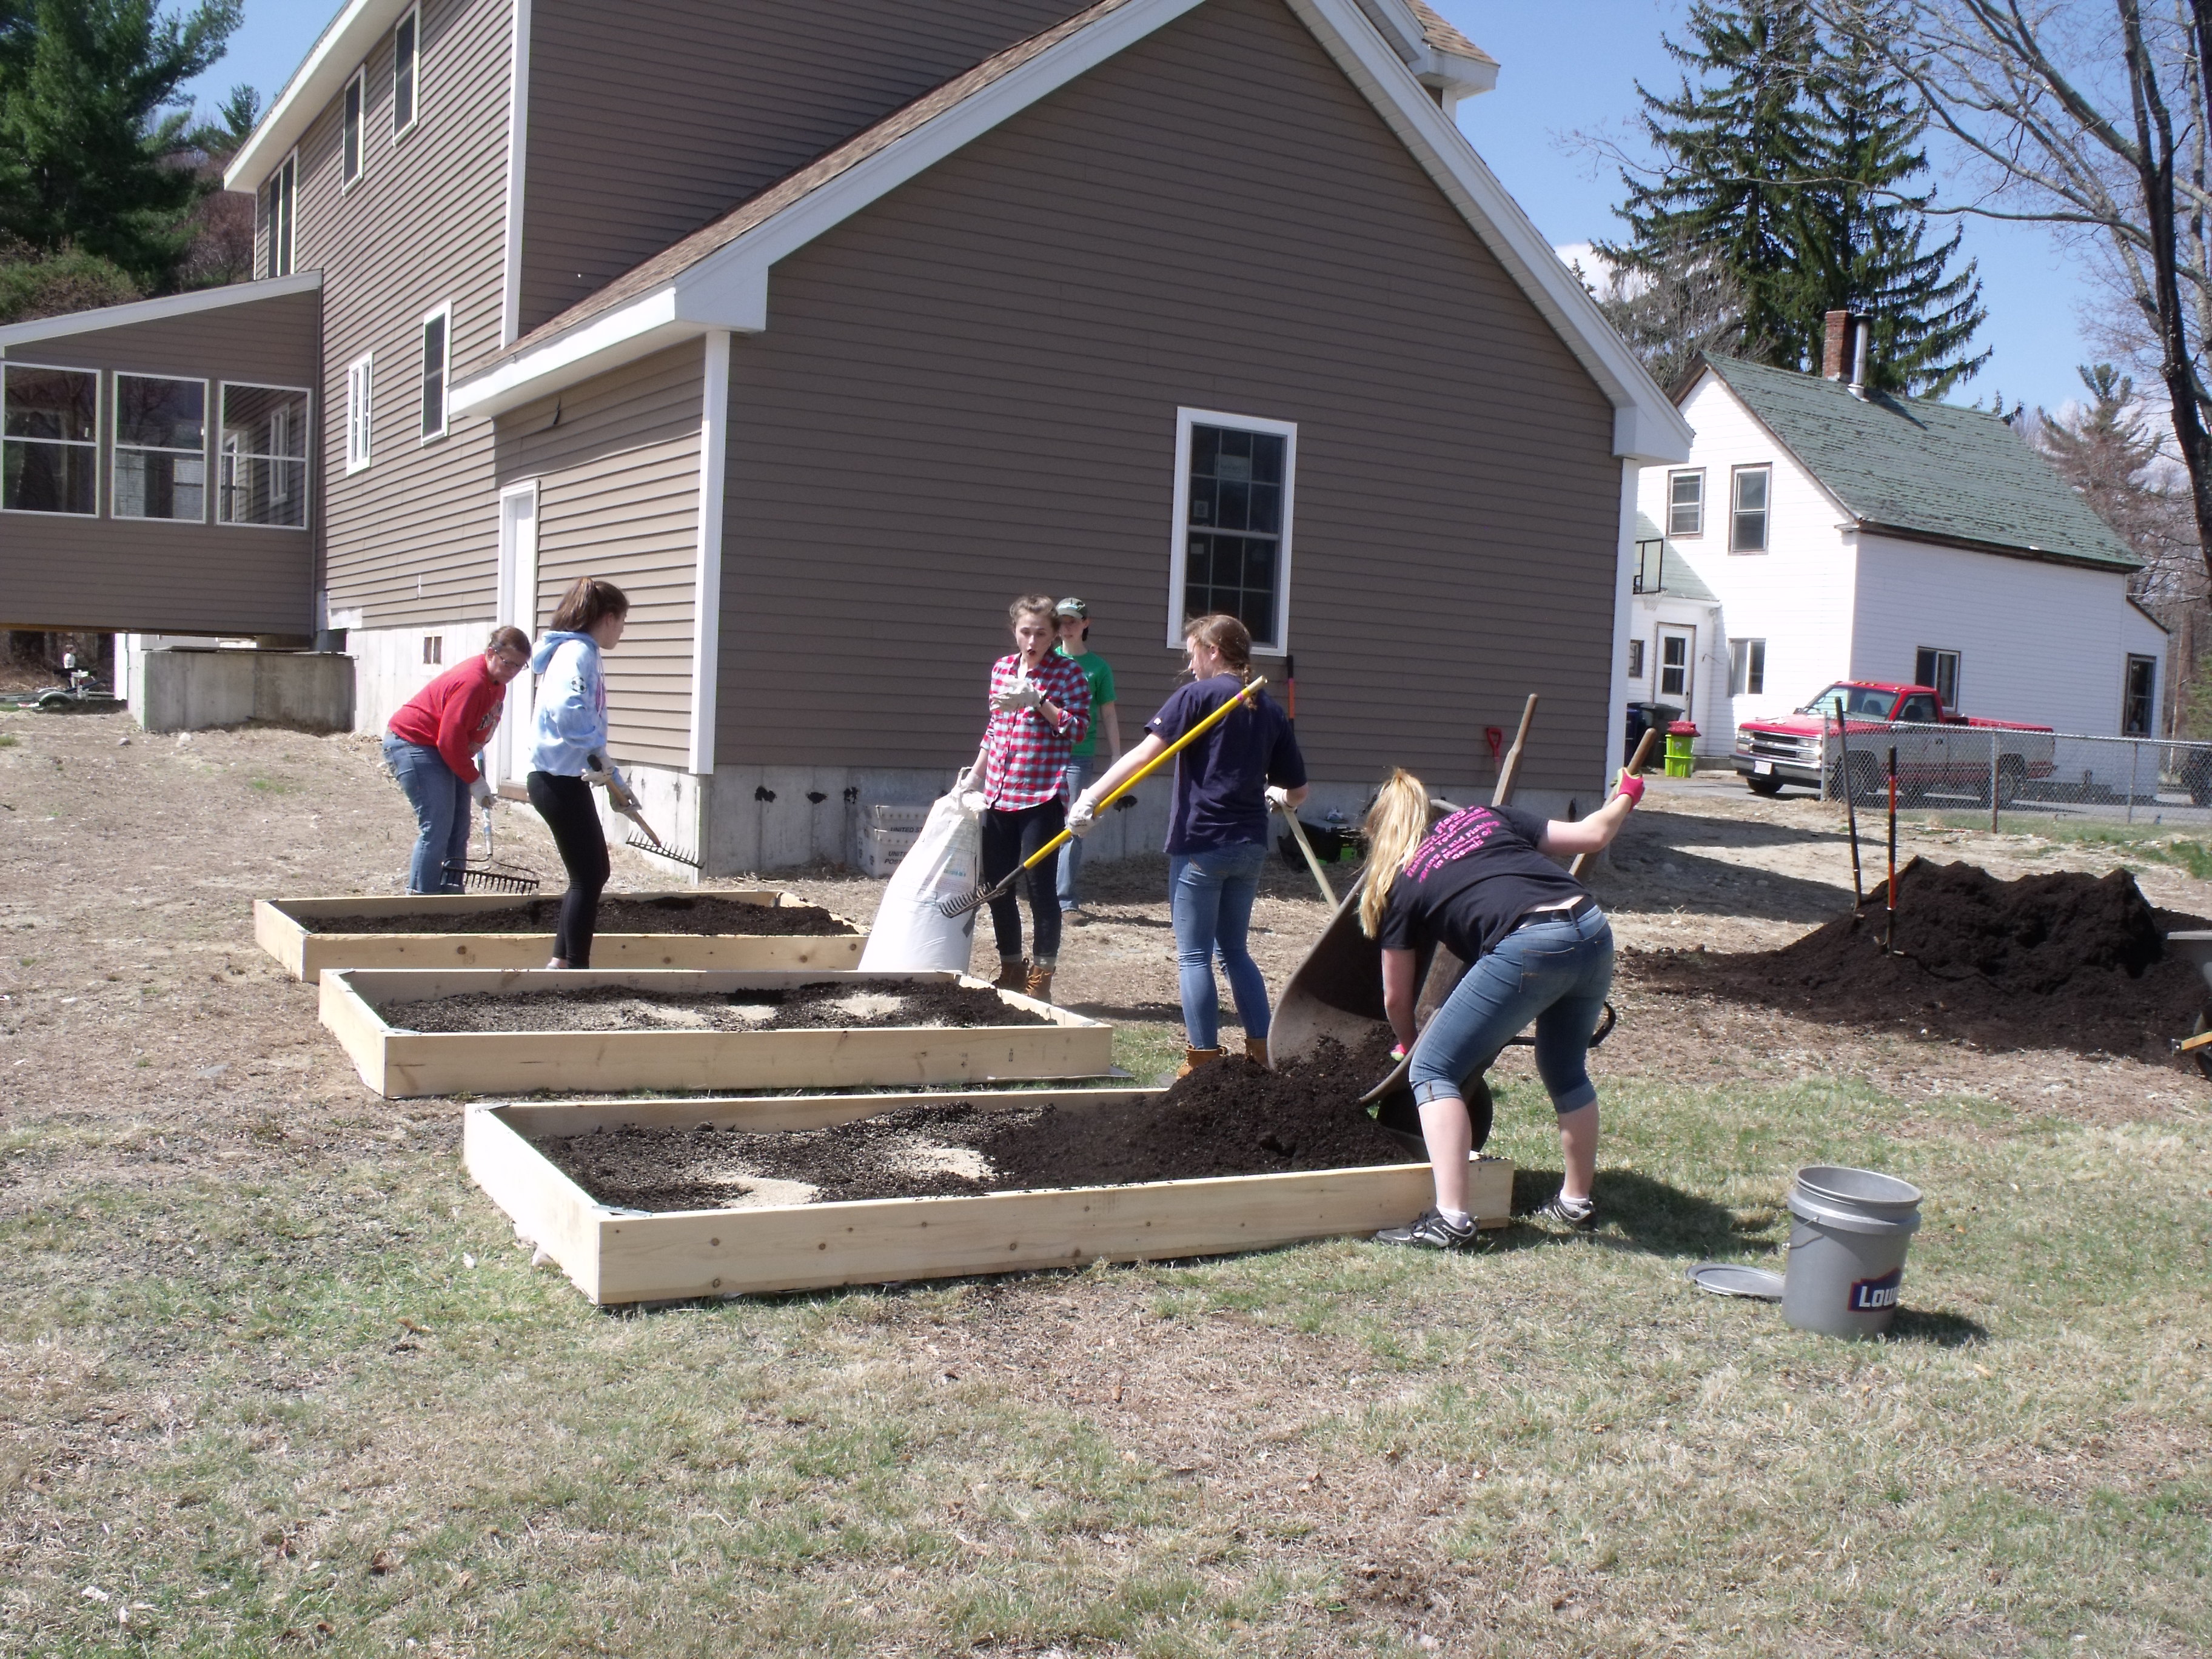
With the lining in place, you’ll add your soil. We’ve sourced our soil mix from different places over the years, including Agway and Sterling Peat and Loam. Both have performed well, but have occasionally been a bit high in organic matter content. We recommend either asking your seller if they’ve done a soil test recently and if you can see it, or testing your soil after installation to see where you’re starting out.
For a three-bed garden (our standard), we mix a 2 cu. yd. bag of vermiculite in with the nearly 3 yards of soil it takes to fill the frames. Vermiculite’s puffed up granules aid in water retention and drainage. For easiest mixing, we alternate adding soil and a dash of vermiculite to the frame, mixing with shovels and flat rakes until all our soil and vermiculite is well blended. Sometimes getting in with your hands to break up any large clumps of vermiculite is the easiest way to go.
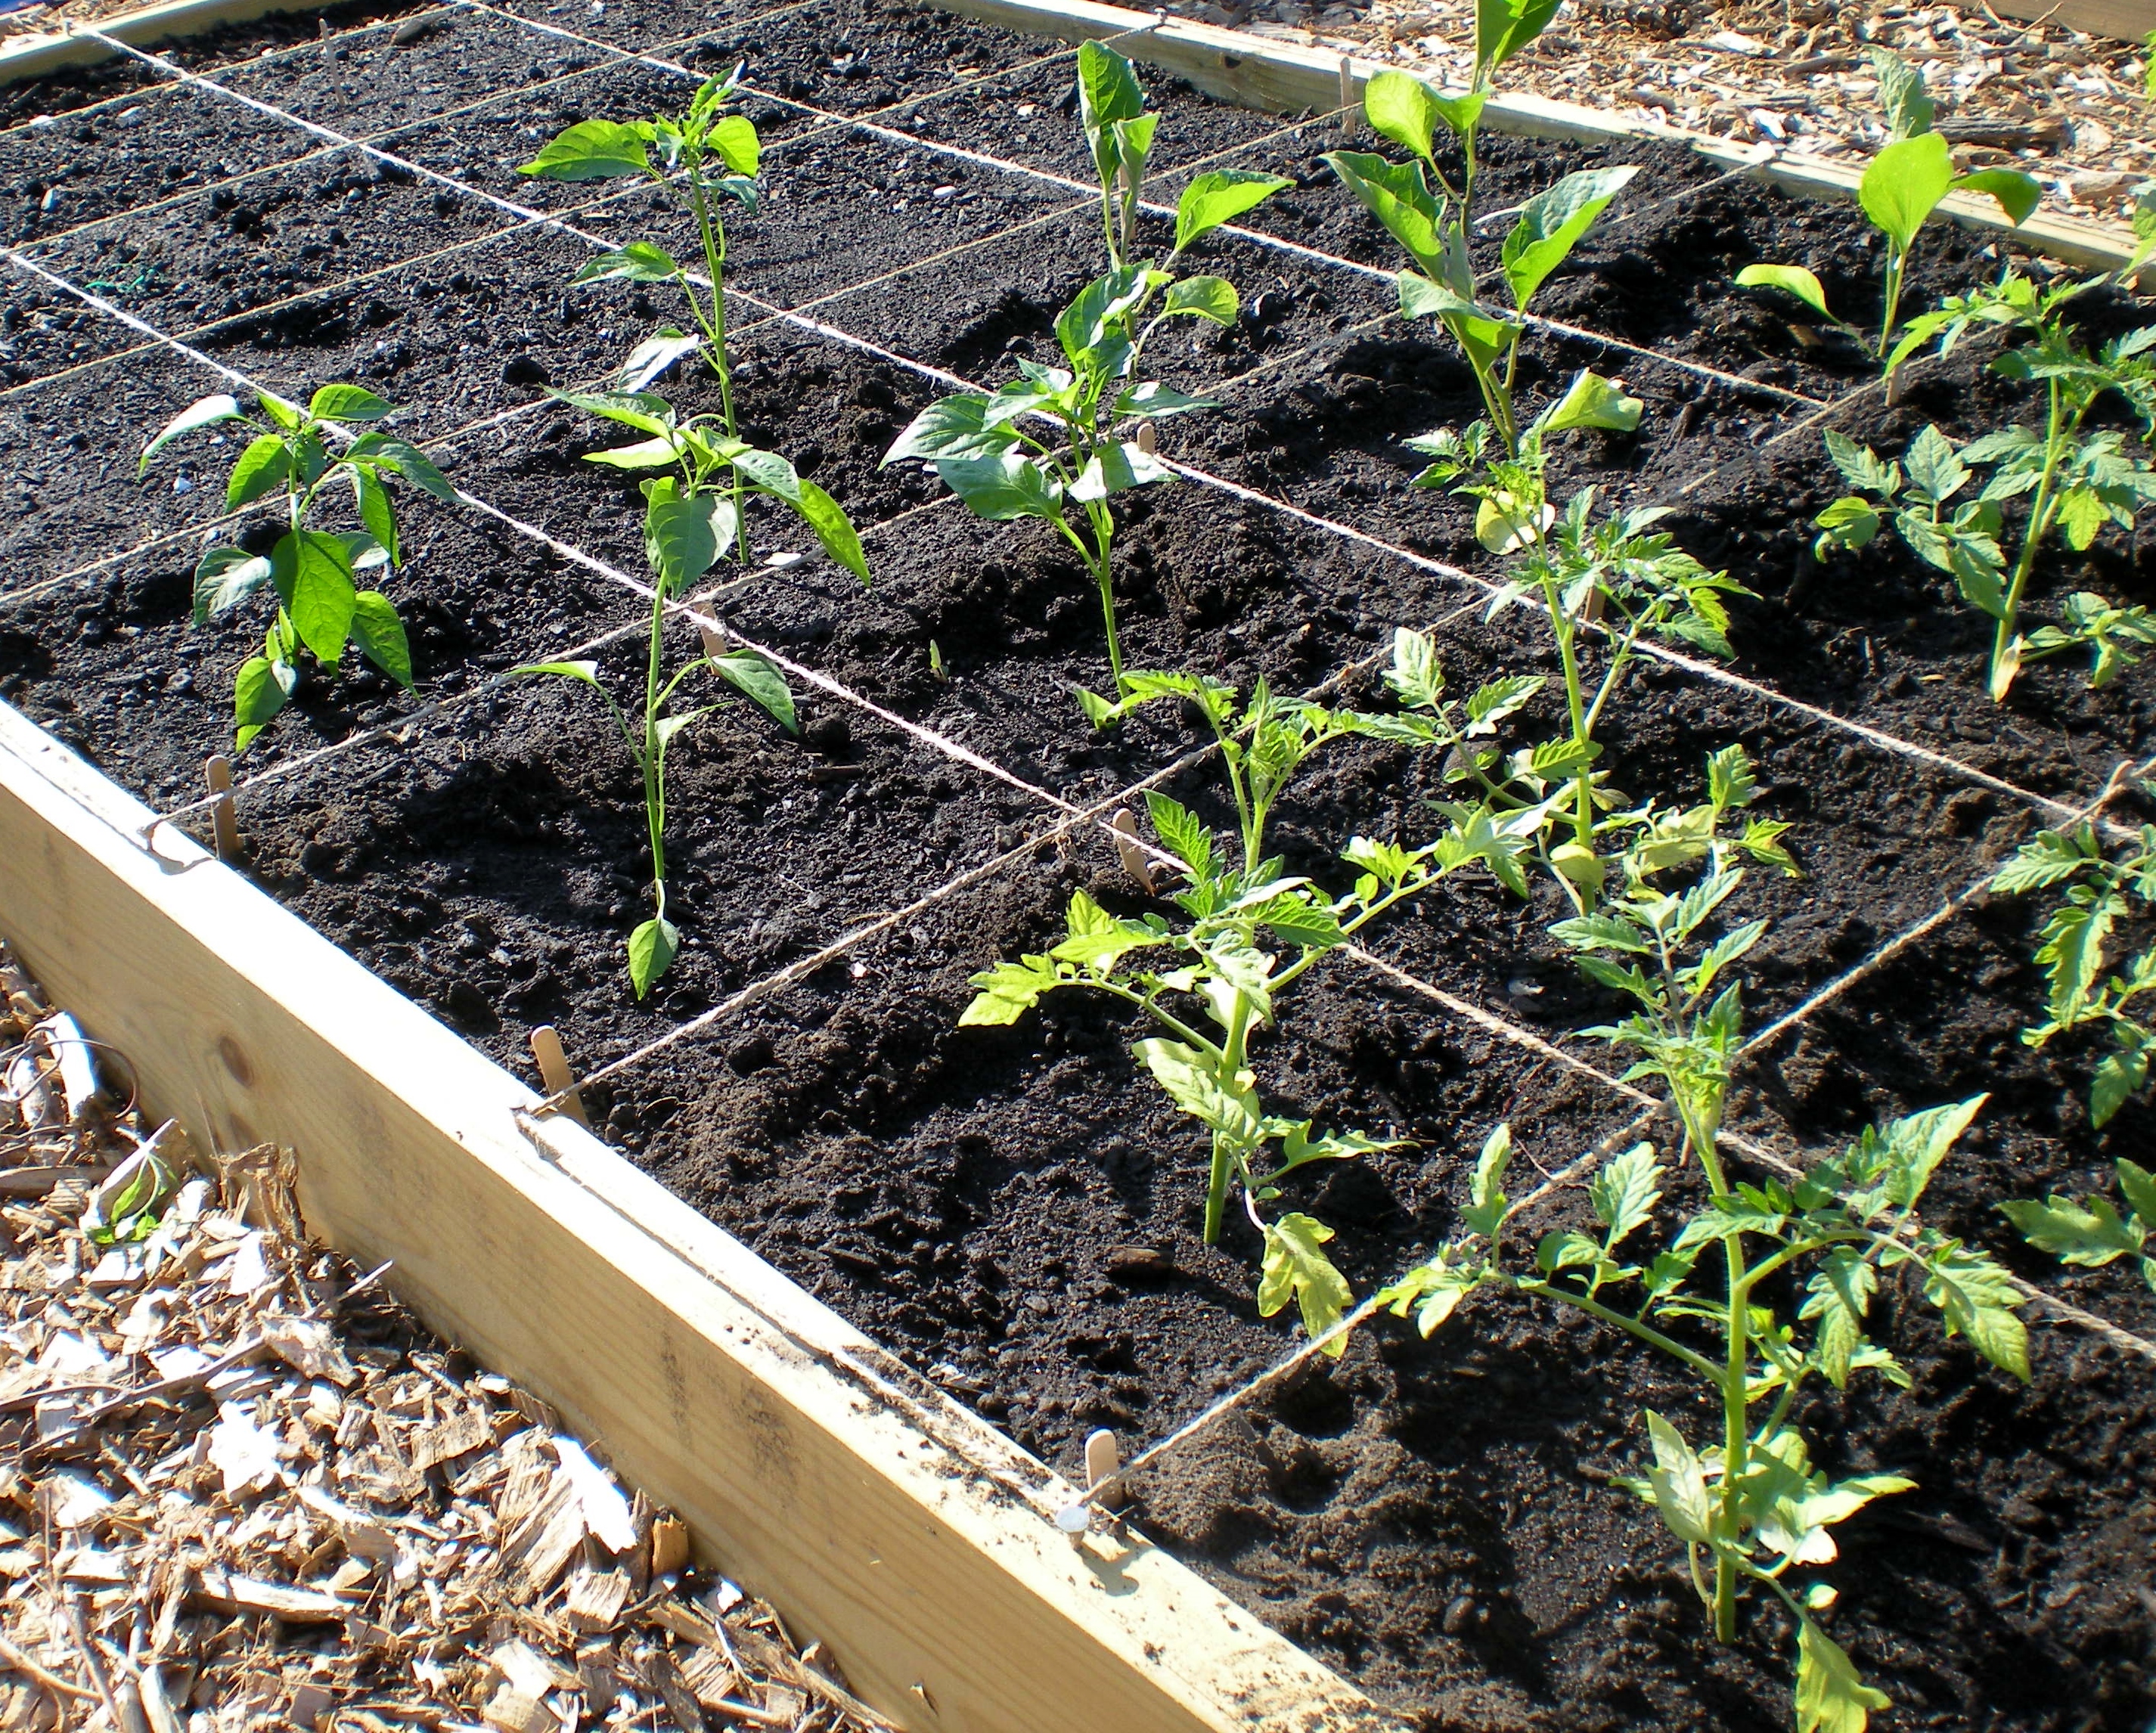
Once everything is well mixed, we mark every foot measurement along all four sides of the top of the frame. This is where the nails will to to help us string our grid for square food gardening. Pound the nails down until only a 1/4″ sticks up. The only step left is stringing twine from nail to nail to form a grid to make square foot gardening as easy as possible.
We hope you’ll give installing a garden a try! Let us know how it goes and if you have any questions.