Build Your Own Garden

2007-12-31 23.00.00-177

One of the perks of the Growing Places Teaching Garden program is the opportunity to earn a free raised bed garden installation. Yep – the whole thing from lumber and hardware to soil and amendments gets brought straight to our gardeners’ homes and installed with the help of local volunteers. Pretty great, right?

But what if you’re not in our program? Or what if the garden we installed needs a replacement or additional bed? Maybe you’re looking to pull off a garden installation of your own. Well, we can help with that, too!

We’ve recently revised our method for constructing simple, 4′ x 8′ wooden raised bed frames and wanted to share. These are the directions for the construction novice. There’s no need for a basement workshop here, just a power drill and probably one other person to help you hold things steady. We’ve had numerous high school volunteer groups knock these frames out in no time flat, so don’t be intimidated by the project if you’ve never attempted anything like it before. It’s a great beginner project.

Instructions for Building a Raised Bed Frame

Once you have your desired number of frames, to install them the GP way, you’ll want to line them with a weed block. This can be as simple as 3-4 layers of newspaper end to end, or plain brown cardboard (not corrugated, which has glue), or, if you want to invest in it, use a permeable landscaping fabric. Be sure not to use straight plastic. Water won’t be able to flow through it and you’ll find you’ve created miniature swimming pools rather than a garden. Be advised, tomatoes can’t swim.

003

With the lining in place, you’ll add your soil. We’ve sourced our soil mix from different places over the years, including Agway and Sterling Peat and Loam. Both have performed well, but have occasionally been a bit high in organic matter content. We recommend either asking your seller if they’ve done a soil test recently and if you can see it, or testing your soil after installation to see where you’re starting out.

For a three-bed garden (our standard), we mix a 2 cu. yd. bag of vermiculite in with the nearly 3 yards of soil it takes to fill the frames. Vermiculite’s puffed up granules aid in water retention and drainage. For easiest mixing, we alternate adding soil and a dash of vermiculite to the frame, mixing with shovels and flat rakes until all our soil and vermiculite is well blended. Sometimes getting in with your hands to break up any large clumps of vermiculite is the easiest way to go.

010

Once everything is well mixed, we mark every foot measurement along all four sides of the top of the frame. This is where the nails will to to help us string our grid for square food gardening. Pound the nails down until only a 1/4″ sticks up. The only step left is stringing twine from nail to nail to form a grid to make square foot gardening as easy as possible.

We hope you’ll give installing a garden a try! Let us know how it goes and if you have any questions.

Some Advice on Soil Testing

grass-seedling-growing-LR

Trying to figure out what amendments to add to your garden soil without soil testing is a lot like a doctor trying to prescribe medication without running any tests first. You can’t tell what’s going on just by looking.

Unfortunately, many folks’ first forays into soil science are overwhelming affairs chock full of flashbacks to high school chemistry class (shudder) and attempts to translate soil-speak terms like N-P-K, macronutrients and organic matter content. We know from our gardeners that some people get frustrated and just give up.

In our Teaching Gardens, we do our best to break the big, daunting picture down into some concrete, common sense steps for keeping your garden soil healthy, without getting too far into the nitty gritty.

Let’s start at the beginning.

WHAT IS SOIL TESTING?

Soil testing is a process used to determine the chemical composition of soil. It compares what’s in your soil, i.e. the nutrients, with the levels that are known to encourage healthy plant growth. Nutrients that should exist in large quantities are called macronutrients and those that should exist in smaller amounts are called micronutrients. Both contribute to healthy soil. Your soil test will measure what’s in your soil currently and make recommendations for how to improve the balance of nutrients if necessary. Again, think of this like a blood test for your garden to help you figure out deficiencies as well as excesses.

WHEN DO YOU NEED TO SOIL TEST?

Soil Test If:

1. You’re planning to add fertilizer or other amendments like compost to your garden soil. If you are planning to adjust your soil, it’s important to know where you’re starting to avoid adding nutrients you may not need. An excess of some nutrients can be just as harmful to plant growth as a lack of them. In addition, excess nutrients can run off into ground water, affecting local drinking water, fisheries and recreational areas.

2. You are starting a new garden. It’s important to test “new” soil for toxic heavy metals, like lead, before starting a vegetable garden in an untried location. Old homes with lead exterior paint that may have gotten into the nearby soil are particular risks. Soil test results can also tell you if you need to add certain nutrients, like nitrogen (N), phosphorus (P) or potassium (K), that might be lacking.

3. You are seeing unexplained symptoms in your garden. Are your plant leaves turning purple? Do you have vigorous leaf growth, but no produce? If you cannot explain a symptom in your garden with pest, disease or human interference, test your soil to see if a lack or an excessive supply of nutrients is causing problems.

4. You are interested in soil science. If you’re curious about the composition of your soil and want to know more about fostering a healthy ecosystem in your garden, soil testing is a great place to start.

Don’t Bother If:

1. Your garden is growing great! Soil testing does cost money, and garden budgets are sometimes tight. If all is well in your garden and it’s unlikely there’s been lead paint in your location, there’s really no need to soil test.

2. You have just received a garden installation from Growing Places. We provide safe, good quality soil for your raised bed installation and there’s no need to soil test.

IF YOU DO DECIDE TO TEST

To help make sure your soil does not change significantly between the testing time and when you next attempt to grow in it, soil test in early spring before you plant or in late fall after your garden has used the bulk of the nutrients it will for the growing season. Often soil test labs are less busy in the fall and can offer quicker turnaround times.

COST

Soil testing costs range depending on how many services you request and how many samples you submit. For one routine soil test, the current cost through UMASS Extension Services is listed at $15 at the time this post was published. A measure of organic matter, which is recommended, was listed as an additional $6 service per sample.

WHERE

UMASS Extension Service offers relatively inexpensive soil testing through their Soil and Plant Tissues Testing Lab. Soil samples and soil test ordering forms can be mailed to:

Soil and Plant Tissue Testing Lab

West Experiment Station

682 North Pleasant Street

University of Massachusetts

Amherst, MA 01003

UMASS Soil and Plant Tissue Testing Lab can also be reached by phone at 413.545.2311 or email at soiltest@umass.edu if you have questions.

Instructions for taking a soil sample are provided on their website: soiltest.umass.edu. A few weeks after mailing your soil sample to the lab, you will receive your soil test results, indicating what nutrients are present in your soil and which are low. UMASS’ soil lab kindly makes recommendations on what to add and how to add it.

TIPS FOR TAKING A SOIL SAMPLE

1. Use clean tools. Clean your trowel and any container you use to hold the soil with soapy water and rinse well. You don’t want any contaminants in the sample.

2. Take a representative sample. This is where common sense, and your knowledge of your garden, really help. UMASS requests a composite sample scooped from a mixture of 12 separate samples from around your garden. If your garden is quite large, this is reasonable. If your garden is on the small side, like ours, 12 samples might just be all the garden soil you have! Instead, consider taking only 3 or 4 samples to mix together. Keep in mind, your soil sample that you send in will be 1 cup of soil scooped from the fully mixed sample you take.

Also consider what you want to know. If you intend to treat your entire garden the same, send in a single sample. If you intend to reserve a portion of your yard for a particular crop – be it asparagus or blueberries or potatoes – send a sample for that portion of the yard separately from the sample you take for the main garden.

3. Take a level sample. Soil composition changes as you dig down into the earth. When taking a sample, do your best to level off your trowel-full so that you have roughly the same amount of soil from 2″ down as you do from 6″ down.

4. Don’t send in wet soil. The labs won’t process a wet soil sample, so be sure to dry your soil out thoroughly before sending it in. Spread the soil on clean paper plates or newspaper for a couple days to allow time for moisture to evaporate.

And finally, our Gurus agree: at-home soil test kits aren’t worth the money. They’re harder to read, offer less precise results, and don’t offer amendment recommendations like you’ll get from a soil testing lab. Worst yet, they’re still $10-$15. If you find you need or would like to test your garden soil, send away to a lab for accurate, thorough results.

Garden Planning: Getting Started

015

In the dead of winter, when the heavy snows, the bitter cold and the heating bills have us all rethinking living in New England, many a gardener has gotten through the short, grey days by curling up with a stack of colorful seed catalogs and a mug of hot chocolate to do some garden planning.

In our Teaching Gardens right now, we’re sitting down with our gardeners to talk about what this process looks like because, while it’s such fun to dream up the ideal garden, whittling your daydream down to something realistic can be a daunting task, particularly if you’re a novice gardener.

Garden planning is an ongoing process. During the season, we assess what we’ve tried this year and make notes about how to repeat, revise or reject it for next year. This information is invaluable because growing the best garden is all about knowing what YOU want out of it and tweaking your plan to match that goal.

Making a list…

And so we recommend beginning with the full-on daydream – the weed-free, bug-less, disease-resistant garden in your imagination that has every veg, fruit, herb and flower you want to grow. Start by making a list of everything you see in your mind’s eye. What’s growing there? Flip through those seed catalogs for inspiration and see what catches your eye. Jot it down without censoring so that, in the end, you have a long list of plants you’d be thoroughly delighted to grow. This is a critical (and really fun) step; we recommend beginning your garden from a point of giddy excitement so that in mid July when a heat wave blows through, and your patch of Eden needs watering daily, you won’t resent the work of keeping it alive.

Checking it once….

Once your list is drafted, you’ll no doubt realize that you have far more on your wish list than you can accommodate in your garden plot. There are so many beautiful, exciting crops available; it’s easy to want to grow them all. The trick is getting a satisfying mix of crops that you both want to grow and can fit.

The first crops to whittle away are those that won’t grow in your hardiness zone. USDA Plant Hardiness Zones are based on the average minimum winter temperatures, meaning how cold it’s likely to get during a typical season. This information gives a sense of what can survive in our climate and which crops will need a warmer or longer growing season. Most seed catalogs will state the preferred range for each crop. Territorial Seed Co. is a reliable source for this information, especially if it’s not listed for a variety you found on another site. To find your hardiness zone, you can check the USDA Plant Hardiness Zone website. Locally, we’re zone 5b in Leominster and Fitchburg and 6a in Clinton. Once you know your zone, work your way through your list for any crops that need warmer zones, represented by numbers higher than yours. Cross them off or see if they might make suitable houseplants instead.

Checking it again…

Once you’re down to just the crops you can grow out of doors, you’ll want to weigh up what it takes to grow each crop against your desire to grow it. Each crop needs a certain amount of space (which you can check in our Growing Guide) and it will need that space for a set amount of time, be it a month or the whole growing season. Some things require significantly more effort to grow, like tomatoes that need pruning, staking and tying up. And some crops are easy enough to find from other sources that you might not consider them worth your garden real estate. All these factors help you determine whether or not each crop is, in your opinion – the only one that matters here – worth it. Mull it over. Then mull it over some more. During the winter season, take your time and re-prioritize your list until you feel satisfied with the mix.

Getting it on paper

Here’s where push comes to shove. Looking at your list, canGarden Planning Organizer you jigsaw all your crops into your garden space? Put it on paper so that, come spring, you’re confident you have the room for everything you’ve purchased. This part may take several drafts, so have your eraser handy. In fact, you might have to repeat the previous step if it turns out you just don’t have the space you thought you did. Again, take your time over the winter and have fun puzzling it out! Come spring, you’ll have a clear plan for your garden and a record to refer to the following season.

Garden Planning Organizer with blank square foot gardening grids

Getting the Most from Your Harvest Season

Janet's Harvest_8-13-13_JO

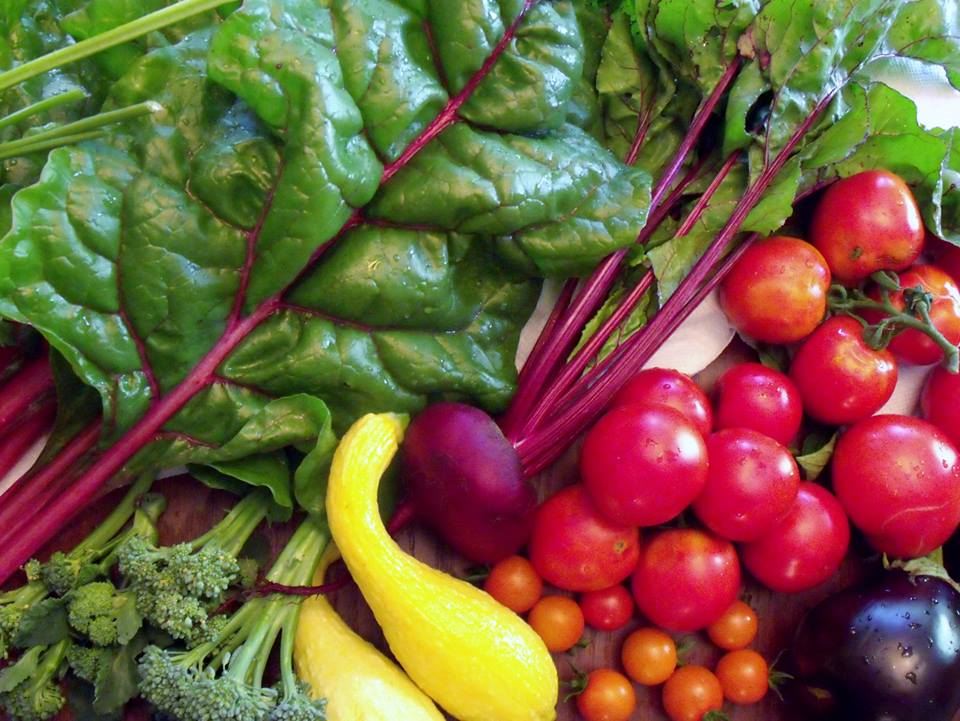
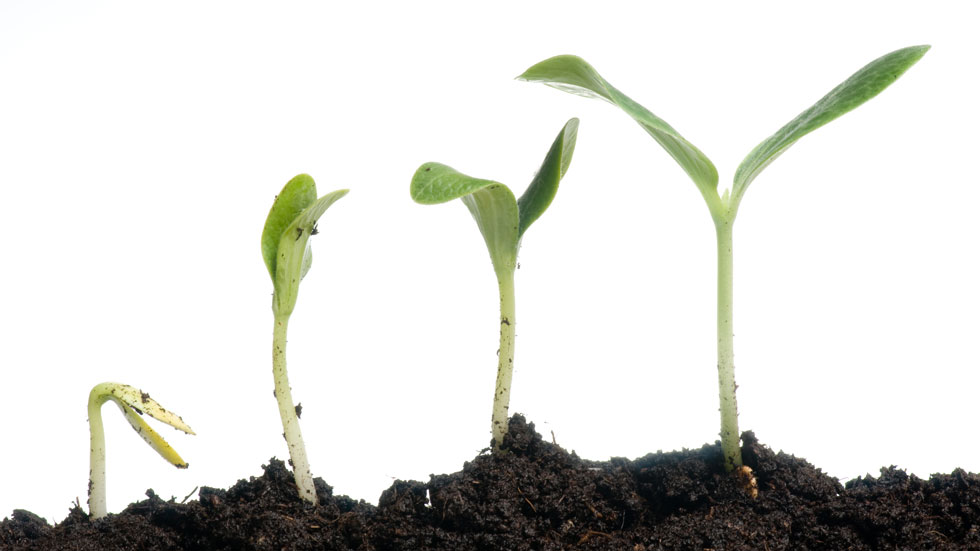
Ah, the harvest season! It’s finally time to enjoy the literal fruits of our labor in the Teaching Gardens and in our gardens at home, right?

Al-most!

There’s a critical step between watching those glittering fruits and dew-speckled veggies mature in the garden and being able to devour them: successful harvesting. Harvesting seems like a simple process – and don’t get us wrong, it is – but it’s also a step that, if done improperly, can wind up spoiling your produce or impeding future harvests. Correct harvesting isn’t always as simple as yanking the veg off the vine and it can be the difference between one delicious bell pepper and that full peck of peppers you were anticipating. In short, it’s worth committing a few tips to memory.

There are three important considerations when harvesting: when to harvest, how to harvest and how to store your veggies if you’re not planning to start the devouring straight away. Below, we go through some common crops and outline how to take them from your garden to your table with maximum flavor and nutrition. Take these tips to your garden and, with a little practice, you’ll be a harvesting pro!

image7

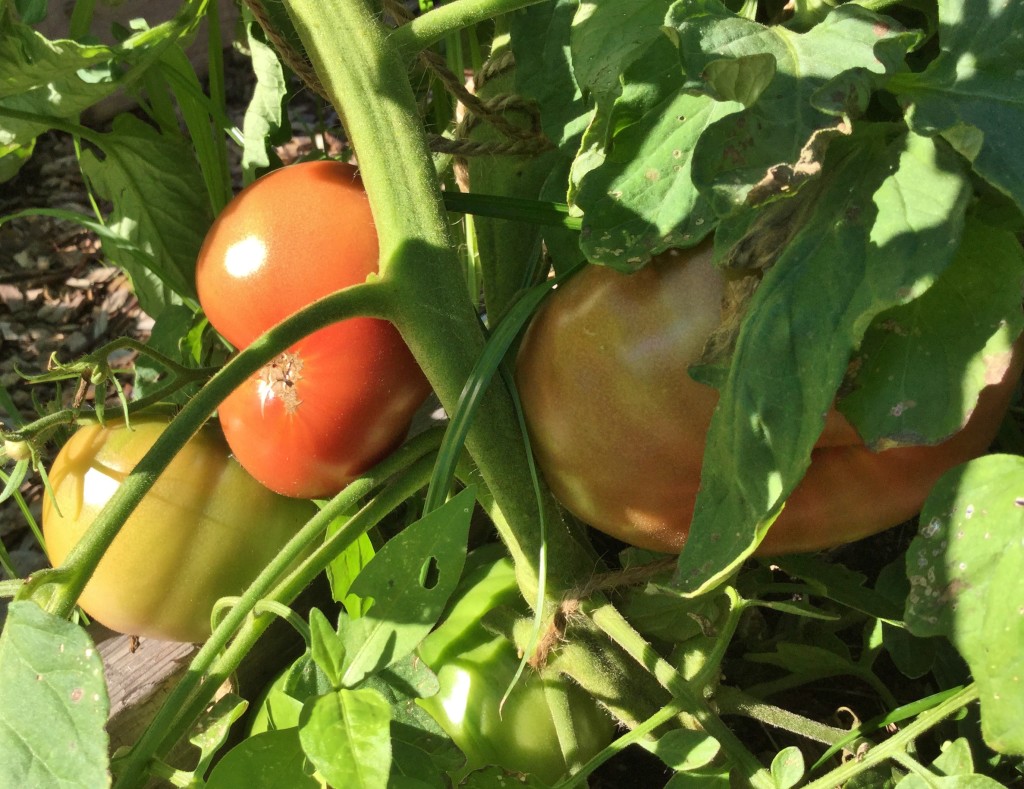
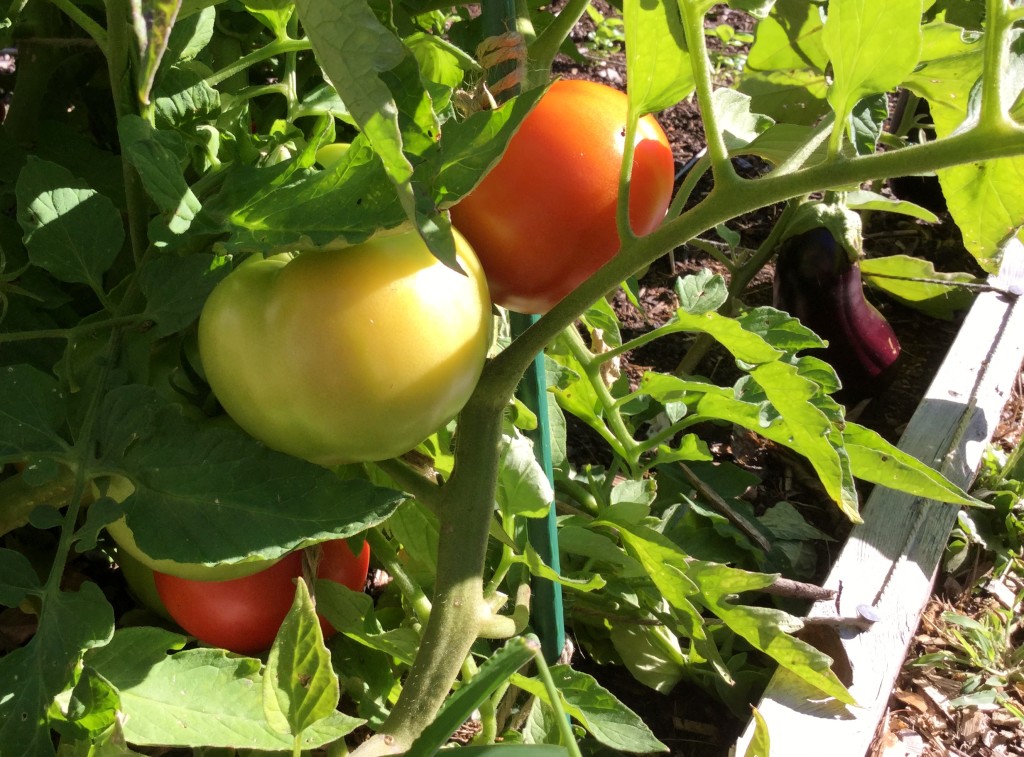
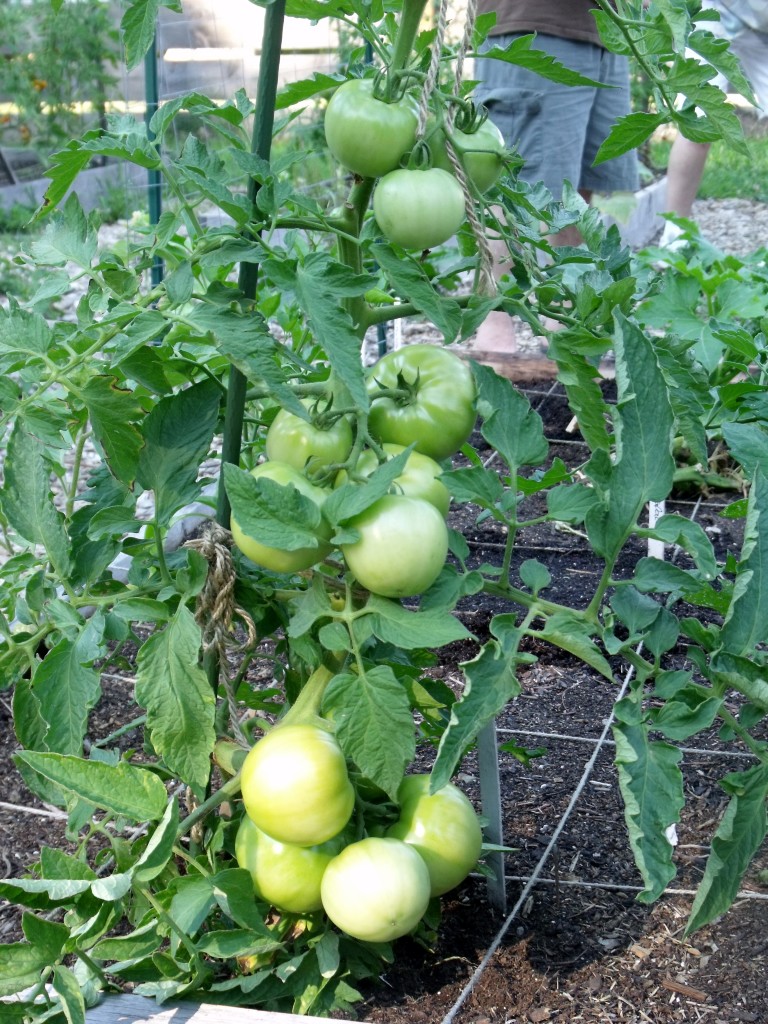
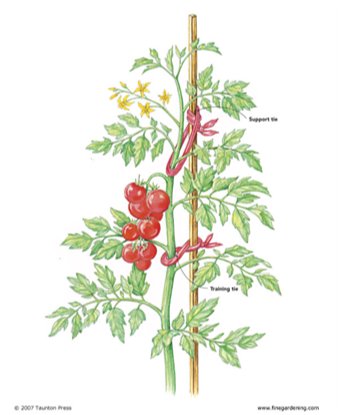
Tomatoes: Tomatoes come in all shapes, sizes and colors, ranging from classic red to pink to yellow, purple and even white. Tomatoes are fully ripe when the fruit is firm, but not hard, and the tomato is uniform in color, which makes it especially important to be familiar with the variety you’re growing. For example, you’ll miss out entirely on your Sun Gold cherry tomatoes if you’re waiting for them to turn red because this variety turns a deep, brilliant orange when ripe. Ripe tomatoes should twist off easily from the vine.

Ripening tomatoes are prone to splitting, which occurs, usually after heavy rain, when the fruit inside grows faster than the peel on the outside and causes the skin to burst. Keep an eye on the forecast: if you’re due for a particularly rainy week and your tomatoes are close to ripe, pick any that are ripe or near-ripe to avoid this.

If you’ve picked your tomatoes before they are fully ripe, or even when they’re green, they’ll continue to ripen indoors on a windowsill. Once they reach peak ripeness at room temperature, by all means eat them! If you can’t eat them immediately, a short stint in the refrigerator won’t hurt; just give them about half a day back on the shelf to recover some of their flavor and aroma afterwards.

Summer Squash (4)Squash/Zucchini: Squash and zucchini are harvested when they reach about 6-8 inches in length. Have you ever thought you caught them all, and then, days later, discovered a torpedo-sized fruit among the foliage? While your monster squash might win you a contest somewhere, baseball bat fruits aren’t ideal for eating. The skin will be tough and the inside will be mostly wet, seedy membrane instead of creamy, melt-in-your-mouth squash. Be diligent about checking your plants at least every other day while they’re are producing. This regular harvesting will spur plant production and ensure your harvest doesn’t get ahead of you. To harvest, cut the fruit off the vine using a sharp blade (pruners, a sharp knife, scissors), and leave about 1 inch of stem on the fruit. Refrigerate, unwashed, in the crisper drawer for up to one week.

Green Peppers (2)

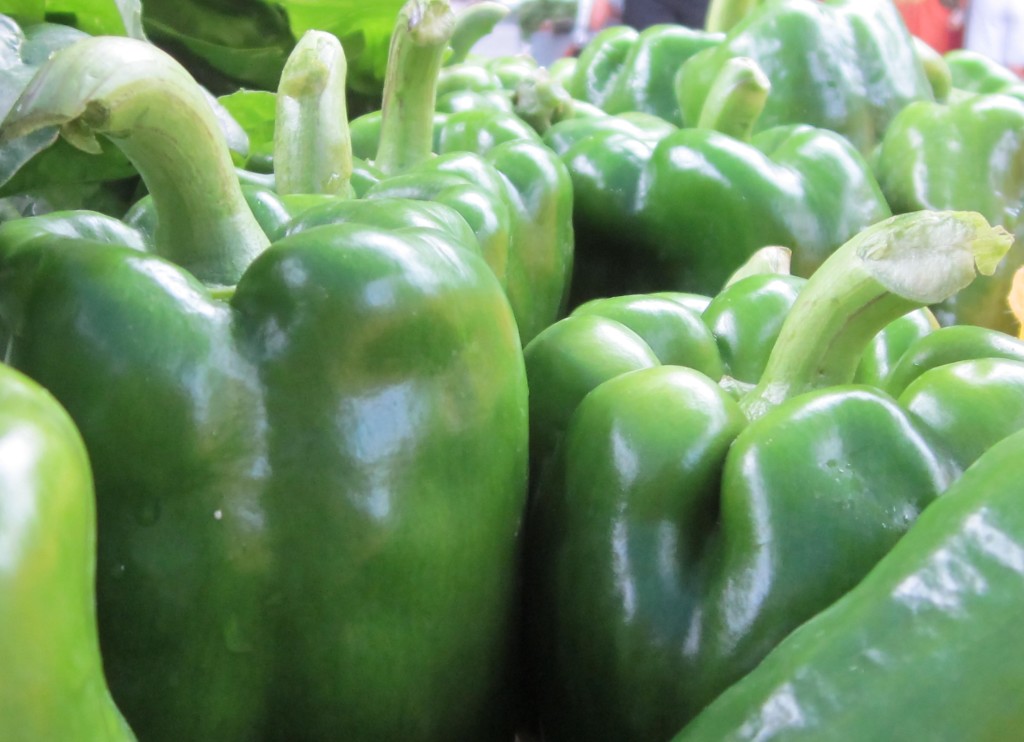
Peppers: Bell peppers are harvested when firm, glossy, and fully grown, usually at about 3-4 inches in size. To harvest the fruit, use a sharp blade, leaving about an inch of stem on the pepper; yanking or trying to twist off the fruit risks uprooting the whole plant and bringing about a sudden, tragic end to your pepper harvest season. Avoid this.

Green peppers are technically unripe bell peppers. Given sufficient time, your bell peppers will turn red, orange, yellow, purple or brown depending on the variety you’ve chosen, and as their color develops, the flavor will get sweeter.

For hot peppers, the longer they are kept on the vine, the more the heat will intensify. Refrigerate whole, unwashed peppers for 1-2 weeks in the crisper drawer.

DSCF5055

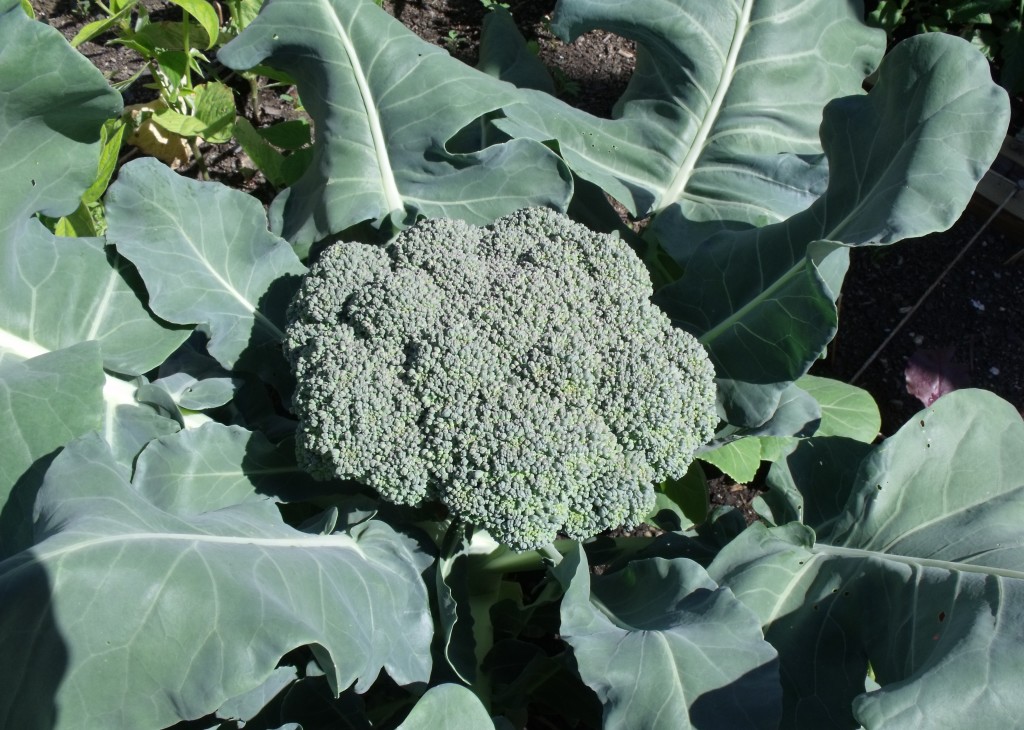
Broccoli: What we know as broccoli is truly a collection of teeny flower buds clustered together to form a head at the center of the broccoli plant. The best time to harvest the broccoli head is when it’s 4-8 inches across (depending on variety), is dark green, and the flower buds are still tight. Any sign of swelling or hint of yellow indicates that the buds are about to flower and the head is past its peak. Cut the mature head off with a sharp knife, leaving about 2-3 inches of a single, thick stem. After this first harvest, side sprouts will spring from the leaf joints of the plant and can be harvested in abundance for weeks to come. Store unwashed broccoli in an airtight container in the refrigerator. Cooked broccoli freezes well.

2012-08-26 011

Swiss Chard and Kale: Chard and kale are prolific vegetables. Individual plants will produce from early spring into late fall, and continual harvesting will spur the plant to keep growing. To harvest, remove the leaves at the bottom of the stalk with a knife or clippers. The inner leaves will continue to mature and will be ready for your next harvest. Store unwashed leaves, wrapped in a damp towel or in a container in the refrigerator for up to 1 week.

016 - Copy

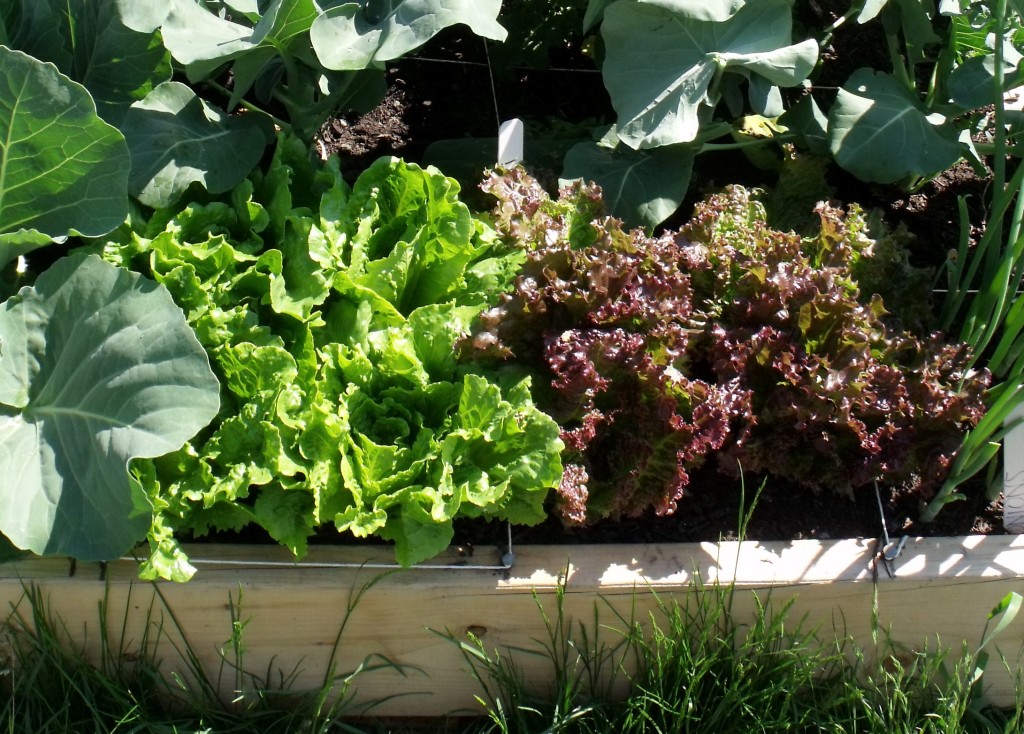
Greens: Harvest lettuce leaves when they’re young and tender; if your plants are under heat stress, this can help to stave off bolting. It’s also best to pick early in the day when the leaves are least bitter. If you have lots of plants, harvest the outside leaves from several plants by using a sharp knife, carefully cutting each leaf off at the base. If you want to remove an entire head of lettuce, again, use a sharp knife and cut the head off at just above ground level. Tender salad greens are best used within a few days. Wrap unwashed greens in a damp towel and place them in a plastic bag in the refrigerator. If your greens wilt between the garden and the kitchen, they can be reinvigorated somewhat by submerging them in ice water for about 15 minutes. 

Arugula, like lettuce, is best harvested when young. If you wait too long, the arugula will become tough and incredibly spicy. Using a sharp knife, cut leaves off your plants when they reach 2-3 inches in length. Store like lettuce in the refrigerator.

Beet Greens

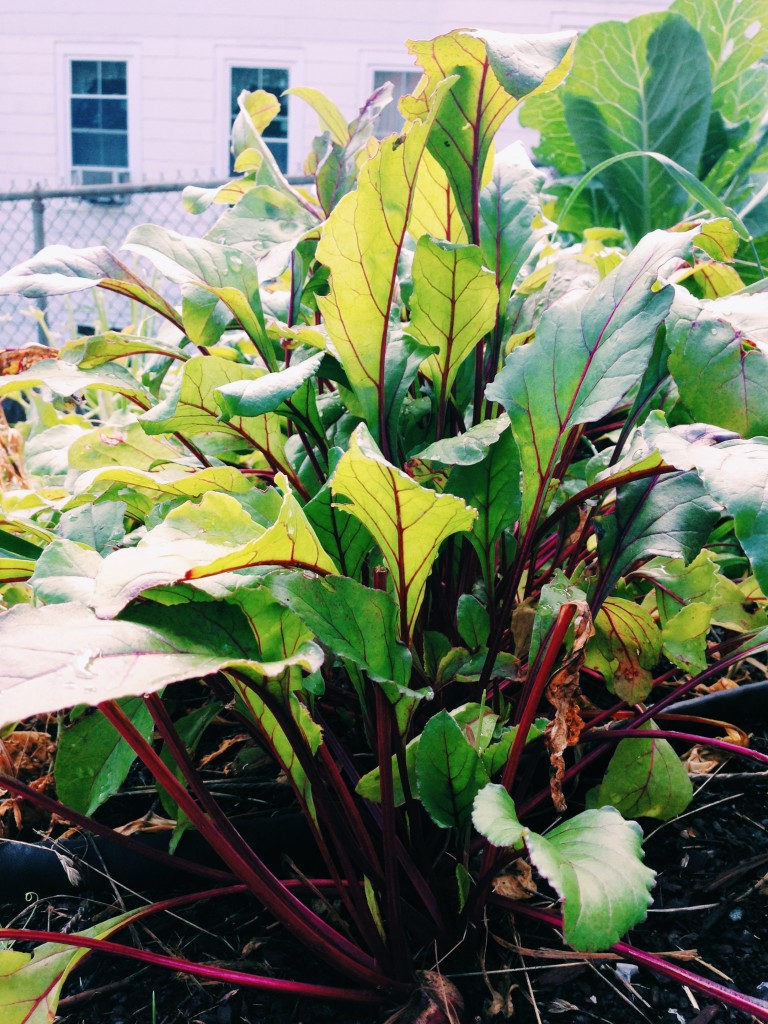
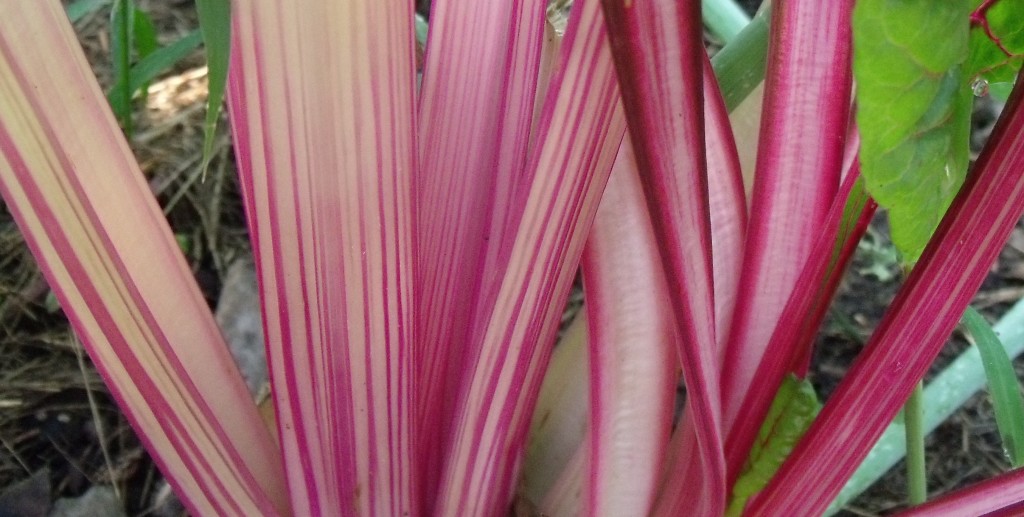
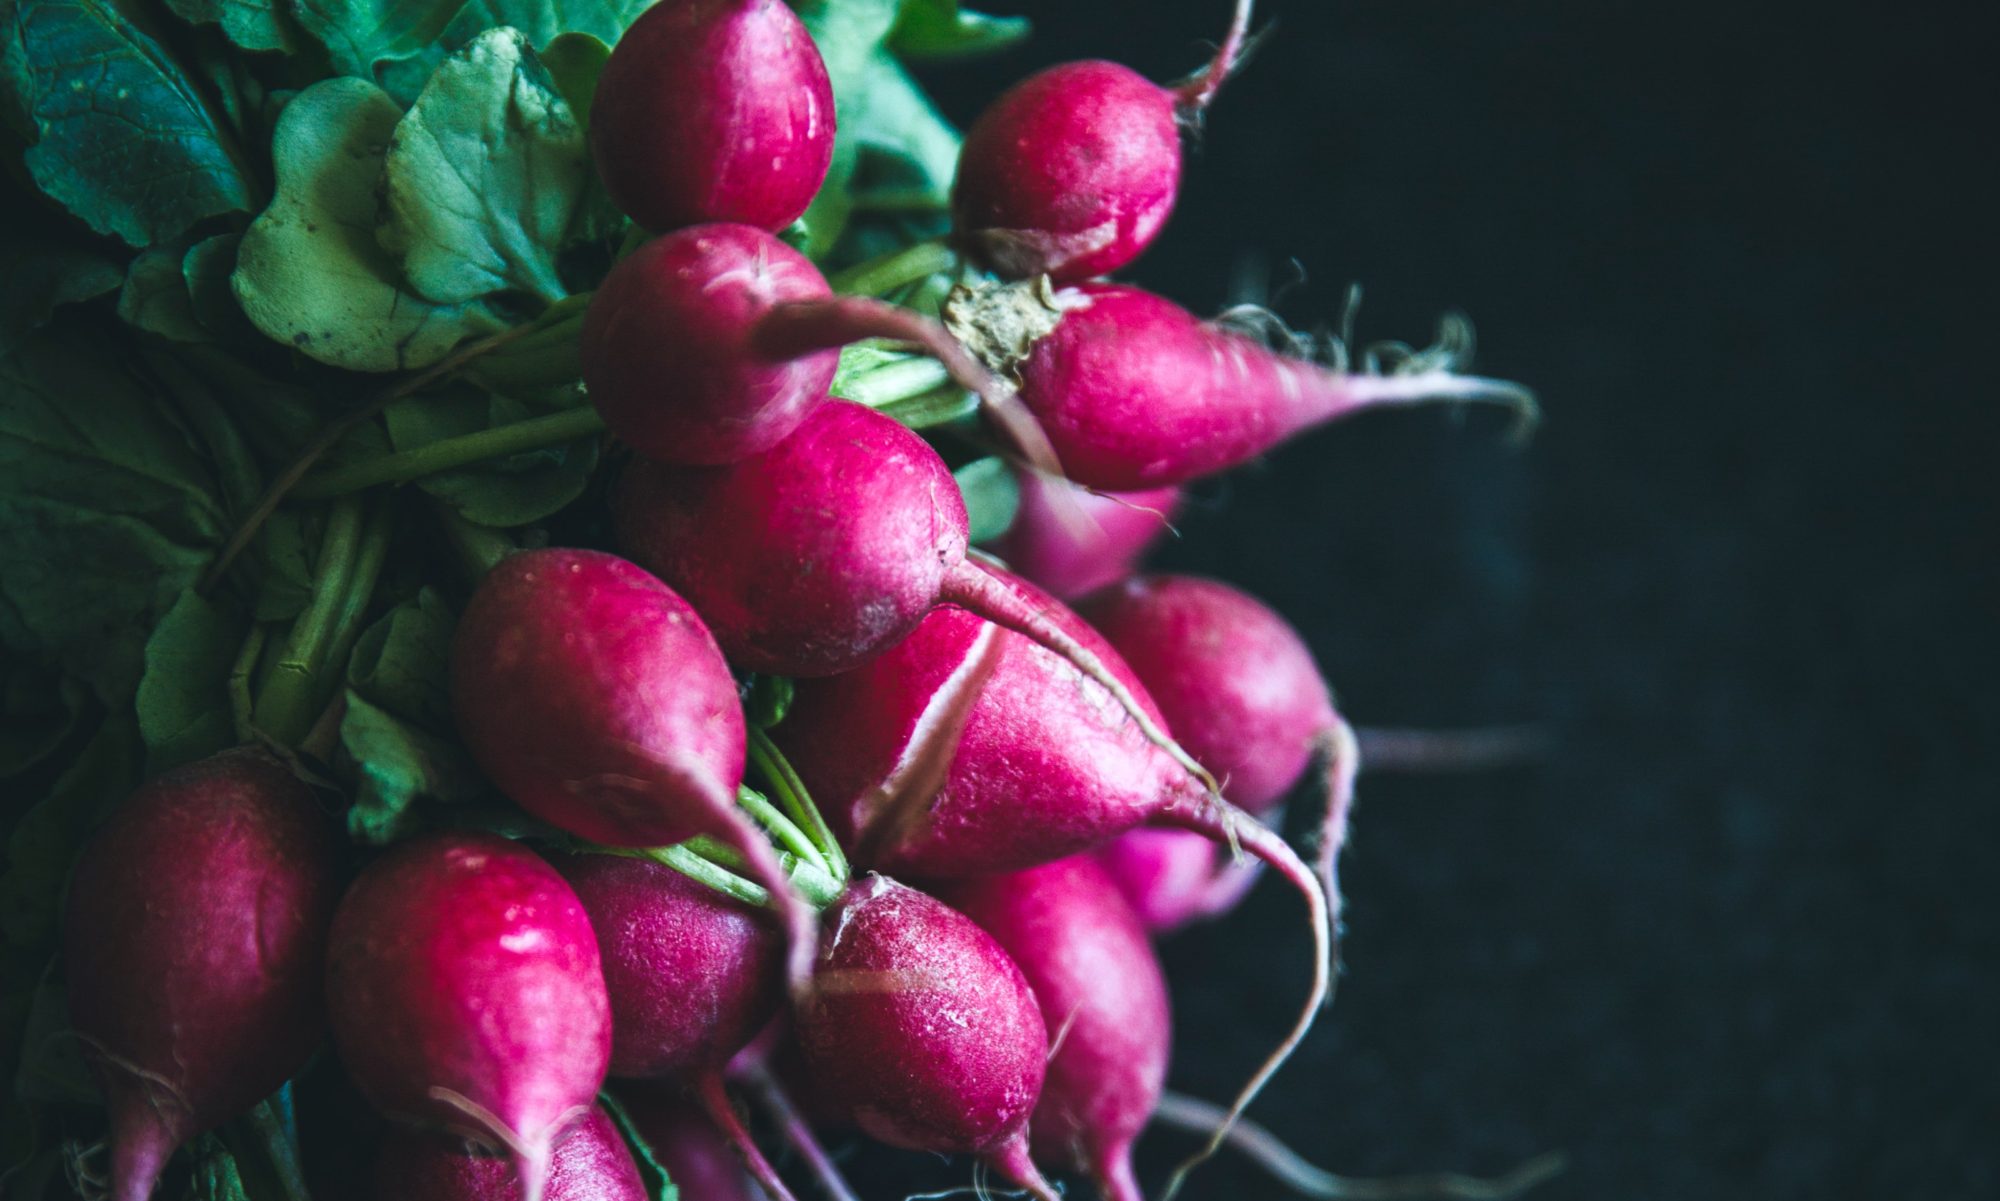
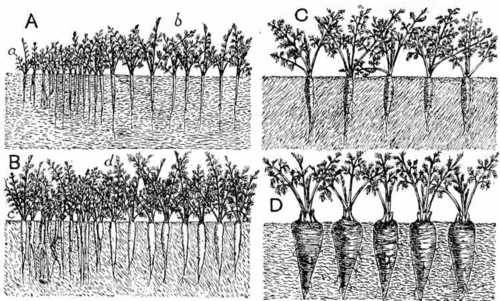
Beets: With all root crops, the trick is knowing when they’re ready. The easiest way to do this is to dig down and feel around the base of the stems of the beet to determine the root size with your finger. Beets are ready to be harvested when they reach about 1½-2” in diameter. Gently pull the plant up from the soil, careful not to disturb other nearby beets that are not yet ready for harvest. Beet greens are delicious, particularly when juiced. Cutting about an inch away from the root, remove the greens and store as you would lettuce or arugula. Keep the roots unwashed and in an airtight container in the crisper drawer where they’ll store for several weeks.  

image2

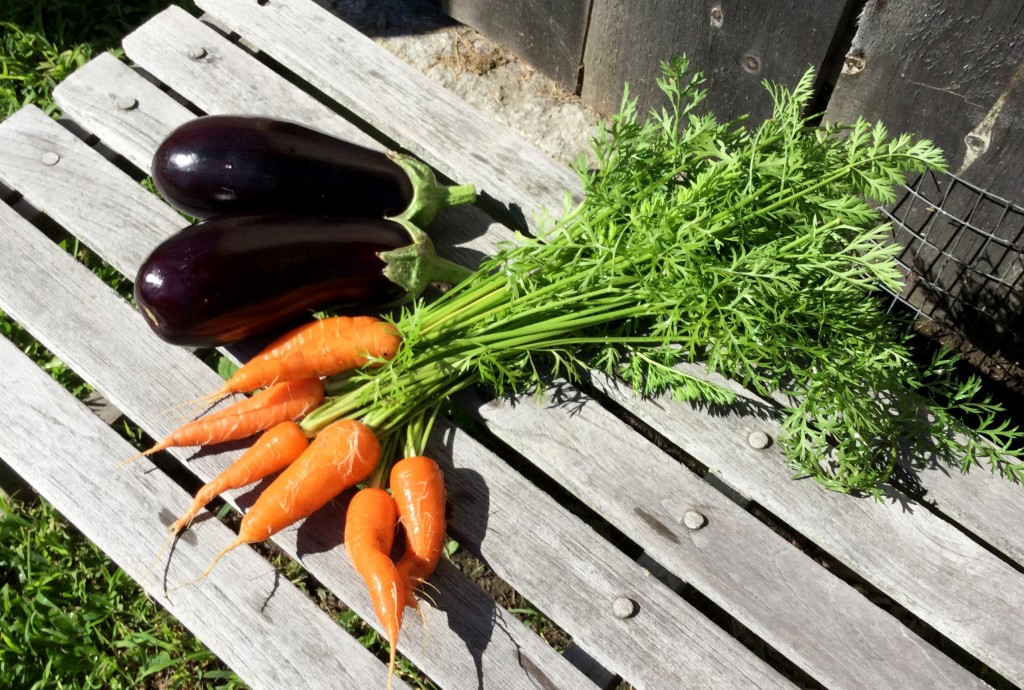
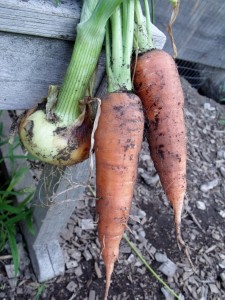
Carrots: Similar to beets, you can determine the size of a carrot by feeling around the base of the greens with your finger. They may be pulled up when the roots are ½ – 1” in diameter. Pull the carrots gently and straight up from the earth. As with beet greens, carrot greens make a great addition to juices. Cut or twist off the tops and placed the roots unwashed in the crisper drawer for up to 4 weeks. 

DSCF5174

Onions: Onions are ready to be harvested when their tops fall over naturally and the leaves shrivel and turn brown. After you dig up the bulbs, you may set them aside in a sunny, airy location for 3 to 7 days to dry, or cure. Do not refrigerate onions. After drying, store in a cool, dry place, (ideally 40-50F) and they will keep for months. Store cut onion in the refrigerator in an airtight container and use as soon as possible.

Happy harvesting!

Garden Fresh Tomatoes Three Ways

image4

The most highly anticipated crop of the summer, the essence of fresh flavor, the garden tomato, is finally showing its red face! Like in most gardens in the North Central MA area, our tomato crop is ripening late this season due to the cool night temperatures we’ve been having, but it’s finally producing its first round of harvestable fruits, and we are delighted. In fact, some of these tomatoes never make it out of the garden as we tend to think the best tomatoes are the ones eaten right off the vine, warm from the afternoon sun.

Once the intense tomato harvest hits, however, you might find you need a few more creative ways of using them up before they pass their peak ripeness. It’s such a shame to see a good tomato go to waste, don’t you agree? (Also, if you’re curious about tomato storage, read up here and here for some cool food science info!)

image8

In our Teaching Garden cooking classes this week, we’re learning how to make gazpacho, a refreshing and cold Spanish tomato soup, perfect for the summer heat. Below is the recipe in our GP cookbook, Dig IN. This recipe is fairly traditional, but omits the typical day-old bread and includes the unique addition of tarragon, an anise-flavored herb that gives the soup a little more kick. If you enjoy this recipe, check out our full Dig IN cookbook, which is available for purchase on our website. It includes plenty of recipes to help make use of the growing harvest and also supports GP programming!

image1

Easy Blender Gazpacho

3 or 4 very ripe tomatoes

1 small cucumber

1 large garlic clove

1 small red pepper

1 small onion

5 sprigs parsley

1-2 sprigs basil

1 teaspoon tarragon

Place tomatoes and cucumbers in blender first. Blend on low, adding ingredients a little at a time until everything is just barely mixed in. (You may have to stop once or twice to stir and incorporate all veggies).

Serve immediately.

 image4

Want more ideas for using up your tomatoes without sacrificing their fresh flavor? Try these two simple, low-cook dishes – both delicious, but also time saving. Change up the recipes based on your own personal taste and what you have available; often the best recipes are created from experimentation.

Tomato Bruschetta

Up to 2 cups of diced tomatoes (any kind you have on hand)

1-2 cloves garlic, finely chopped

3 tablespoons extra-virgin olive oil, plus 1 tablespoon for serving

Pinch of red pepper flakes

¼ cup fresh basil leaves, sliced into ribbons

1 tablespoon good quality balsamic vinegar

½ baguette, cut into ½-inch slices

Preheat the oven to 350 degrees F.

Toss tomatoes, garlic, 3 tablespoons extra-virgin olive oil, red pepper flakes, basil, and balsamic vinegar in a bowl. Season to taste with salt and pepper. Set tomato mixture aside at room temperature to allow the flavors to mingle while you prepare the bread.

Slice the baguette and arrange in a single layer on a baking sheet. Toast in the oven until golden brown, about 5 minutes. To serve, top each slice with tomato mix and drizzle with olive oil. Prep just before serving to avoid the bread getting soggy.

Tuna Stuffed Tomatoes

1 pickle

6 sprigs cilantro

2 tablespoons Greek yogurt

¼ avocado

½ can tuna

2 thin slices red onion

1 jalapeño pepper

2 medium whole tomatoes

Pepper to taste

Slice tops off tomatoes and scoop the insides out into a small mixing bowl.

Dice tomato tops, avocado, pickle, red onion, and jalapeno pepper. Chop cilantro. Toss everything together: tomato insides, tops, avocado, pickle, red onion, jalapeño pepper, cilantro, Greek yogurt, and tuna. Add pepper as desired. Fill tomatoes and serve.


And, just because they’re too lovely to leave out….here are the eggplant and carrots harvested from the Leominster Teaching Garden this week!

image2

Experimenting in the Garden

“There are no failures in gardening, only experiments.”

It’s so true, isn’t it? The garden is such a wonderful place to try something new and, when it doesn’t quite go as planned, revise and try again next year. In a community garden, as all our Teaching Gardens are, we even have the benefit of seeing others’ experiments and incorporating their results into our plans.

In our Teaching Gardens, we’re in the middle of a tomato experiment right this minute that were certainly planning to adjust for next season.

Did you see our earlier blog post or our FB post about the Florida weave method for staking tomatoes? It went like this….

“Place a stake at either end of a row of tomatoes and string twine from stake to stake, weaving in front and behind each plant. As the plants grow, work your way up the stakes with additional rows of twine, spaced about 6” apart or as needed. Easy!”

weave

 Ah, well, easy in theory.

The difficulty became apparent fairly early on. As our vines grew and began to produce weighty, mouth-watering tomatoes, we saw the stakes begin to sag toward the middle, born down by the heft of the four tomato plants between them. In our Clinton garden in particular, where the ground beneath our raised beds is extremely compacted, the stakes were difficult to press far enough into the ground for good stability.

We’d opted for the metal stakes because they don’t harbor blight year to year as wooden stakes can, and we thought they’d last a bit longer. Sadly, they simply aren’t strong enough to support the tomatoes effectively, which outweighs any disease-resistance or lifespan benefits.

At this point in the season, how can we keep the tomatoes off the ground where they’re at risk of rotting?

Option 1: Individually stake the plants. We’ve done this in a few plots in Clinton where it’s been clear no other option would adequately support the vines and their fruit. It’s a bit tricky at this stage to disentangle the vines from the existing weave of twine, but worth it for the end result.

Option 2: Tie the end two tomatoes directly to the stakes, leaving only the two center tomatoes resting on the twine. This has been just enough added support in some cases that we think it will suffice for the next couple months.

Our second, complicating issue is that the vines wobble and fall to the sides even if the stakes don’t sag. Lucky for us, we’ve a genius Teaching Gardener among us (Thanks, Jenn!) who came up with this brilliant solution: knots! As she strings a row of twine, she identifies which way each vine is leaning and ties a stabilizing knot to hold the vine in place. So clever!

DSCF5247

Next year, we’re planning the following revisions for our tomatoes:

1)    Stake with sturdier metal stakes (like in the second photo, above), pounded further into the ground to support the full weight of the fruits. With these stakes, the weave will still work, but will be much more effective with the added use of Jenn’s genius knots.

2)    Alternatively, for anyone who finds the weave a bit too complicated for their liking, we’ll offer single stakes for each plant and tie directly to the stake.

We also wanted to point out how well suckering (pruning off the shoots in the branch joints) can work when done consistently. Check out this tomato plant! Kept to a single vine, the plant is demonstrating all of the key benefits of suckering we mentioned earlier this year: early production, larger, healthier fruit, and disease prevention. Nice work, Maria!

DSCF5252

So on the balance, we figure having beautifully pruned plants that produce too much heavy fruit for our stakes to support isn’t the worst result we could have in our tomato experiment. Wouldn’t you agree? Next season, we’ll still have plenty of improvements to make and hope for an even more impressive harvest!

Thinning

bigstock-Green-seedling-growing-from-so-45185245

As we head into August and sow our second round of seed for a fall harvest, the process of thinning continues to stay relevant in our Teaching Gardens. Although all we sensitive gardeners feel a shot through the heart twinge of regret pulling out thriving seedlings, thinning is important for plant health. The practice of thinning allows plants adequate air flow, which prevents disease, and space to grow to maturity, which lessens the competition among seedlings for nutrients, water and light. By placing just a few more seeds than you need in each hole at planting time, and thinning later, you are ensuring that the healthiest plants survive. Plus, with thinnings from crops like lettuce, beets and spinach, you can create a micro-greens salad any fancy restaurant would be proud to serve!

Mel Bartholomew, the creator of the square foot gardening method, saw that people often wasted seed by not counting out what they planted. Instead, they dumped far more seed than necessary into a small area and eventually thinned out most of what they had planted. Square foot gardening attempts to conserve seed, time and energy by recommending 1 or 2 seeds be sown in each hole. In the case of beets, each seed is actually a cluster of seeds that will result in multiple sprouts, so only one seed is needed per hole. Once the seeds germinate, you’ll only have to pull out a few plants as opposed to many.

Carefully counting out seed also gives you the opportunity to cull, or sort, your seed. Empty a small quantity of seed into your palm and select only the very best looking seeds to plant. These will be large, plump, and blemish-free seeds. Discard any that are discolored, damaged or dried up. The practice is simple, but helps to ensure that you are only working with the best available seed, which will eventually produce the best possible plants.

Once your sown seed has produced at least two pairs of “true” leaves and the sprouts are about 3 to 4 inches tall, it’s time to thin. True leaves are the leaves that emerge after the first set of germinating leaves, which are also referred to as cotyledons or first leaves. While first leaves are typically thick and round or oblong in shape regardless of the crop variety, true leaves will be representative of the mature crop.

how-to-grow-fine-carrots_ illus. credit www.chestofbooks.com_7-29-15_JO(illustration credit: www.chestofbooks.com from Pictorial Practical Vegetable Growing, Walter P. Wright)

 A, a, plants unthinned; b, plants thinned

B, c, d, unthinned and thinned plants at a later stage

C, thinned plants developing well

D, thinned plants ready for harvest

Before thinning, wet the soil to reduce damage to the plants you keep in the ground. With your fingers, lightly press on the soil around the seedlings you intend to keep; with your other hand, grasp the base of the undesirable seedling and gently pull it out, being careful not to disturb the soil more than is necessary. If the seedlings are too close together to pull out without disrupting the remaining plants, use a sharp pair of scissors to snip the unwanted sprouts instead. Spacing will vary according to the particular crop, so check your Growing Guide or seed packet for the recommended spacing distance.

A Good Year

DSCF5158
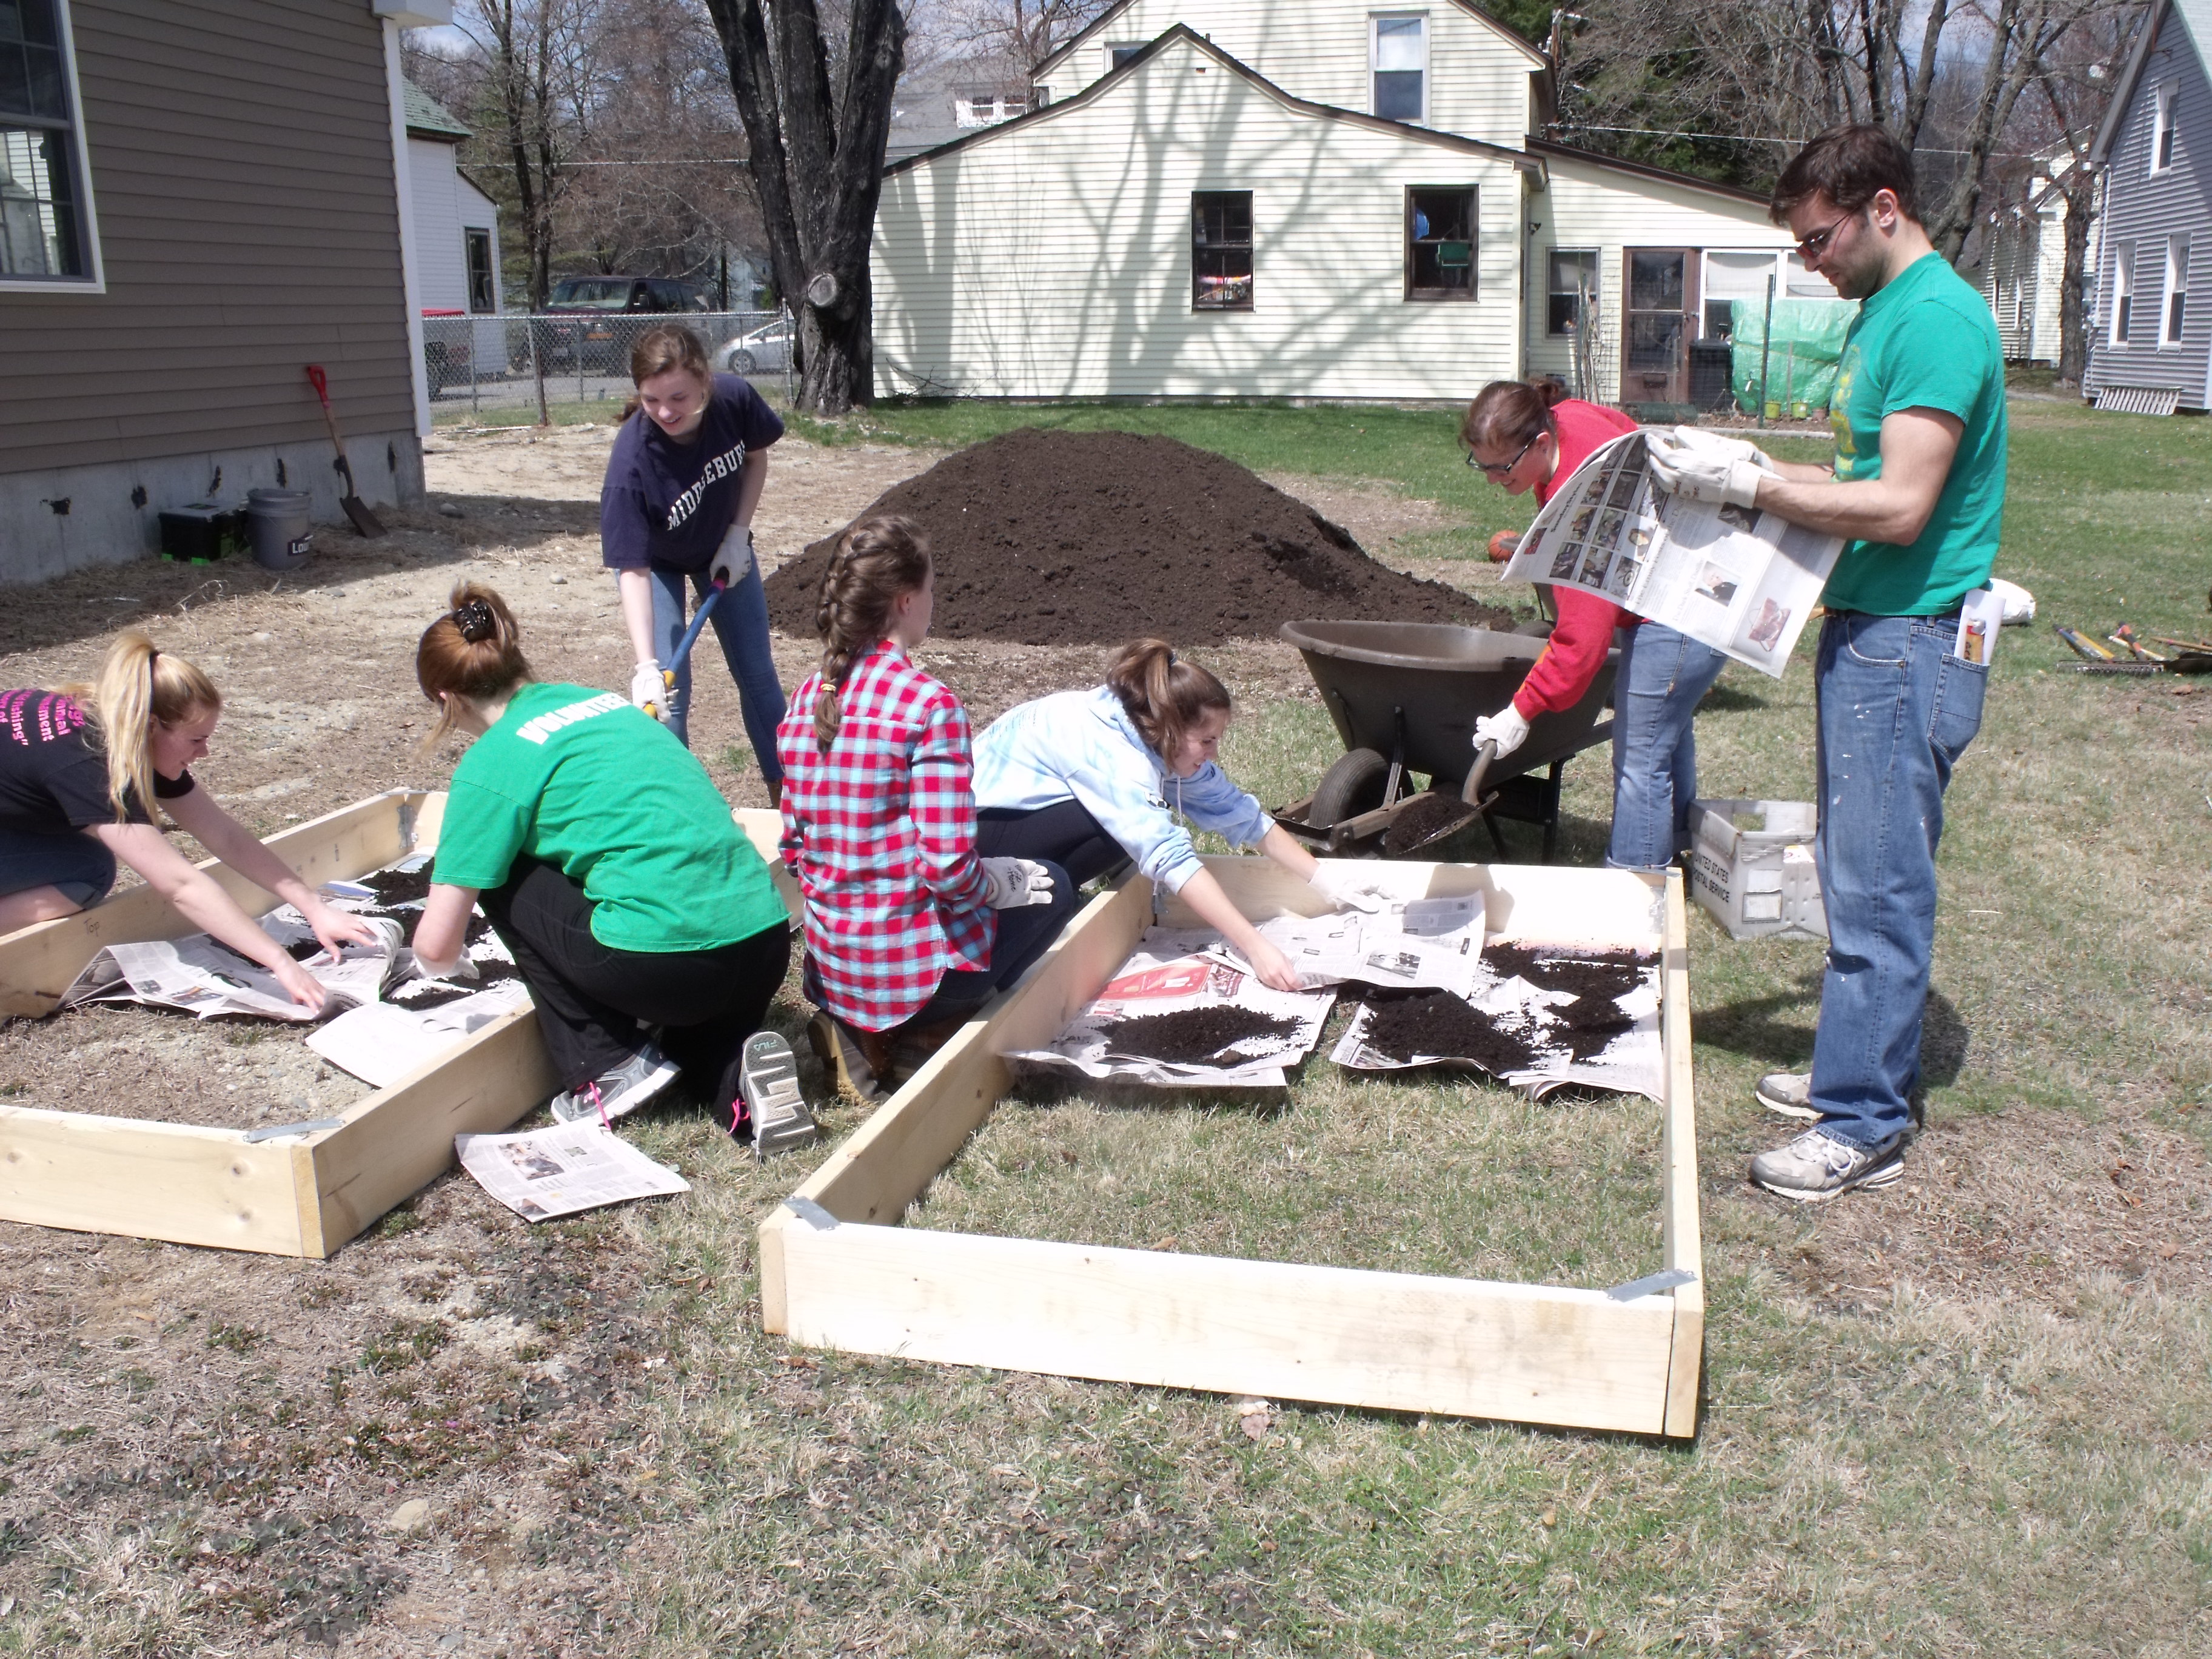
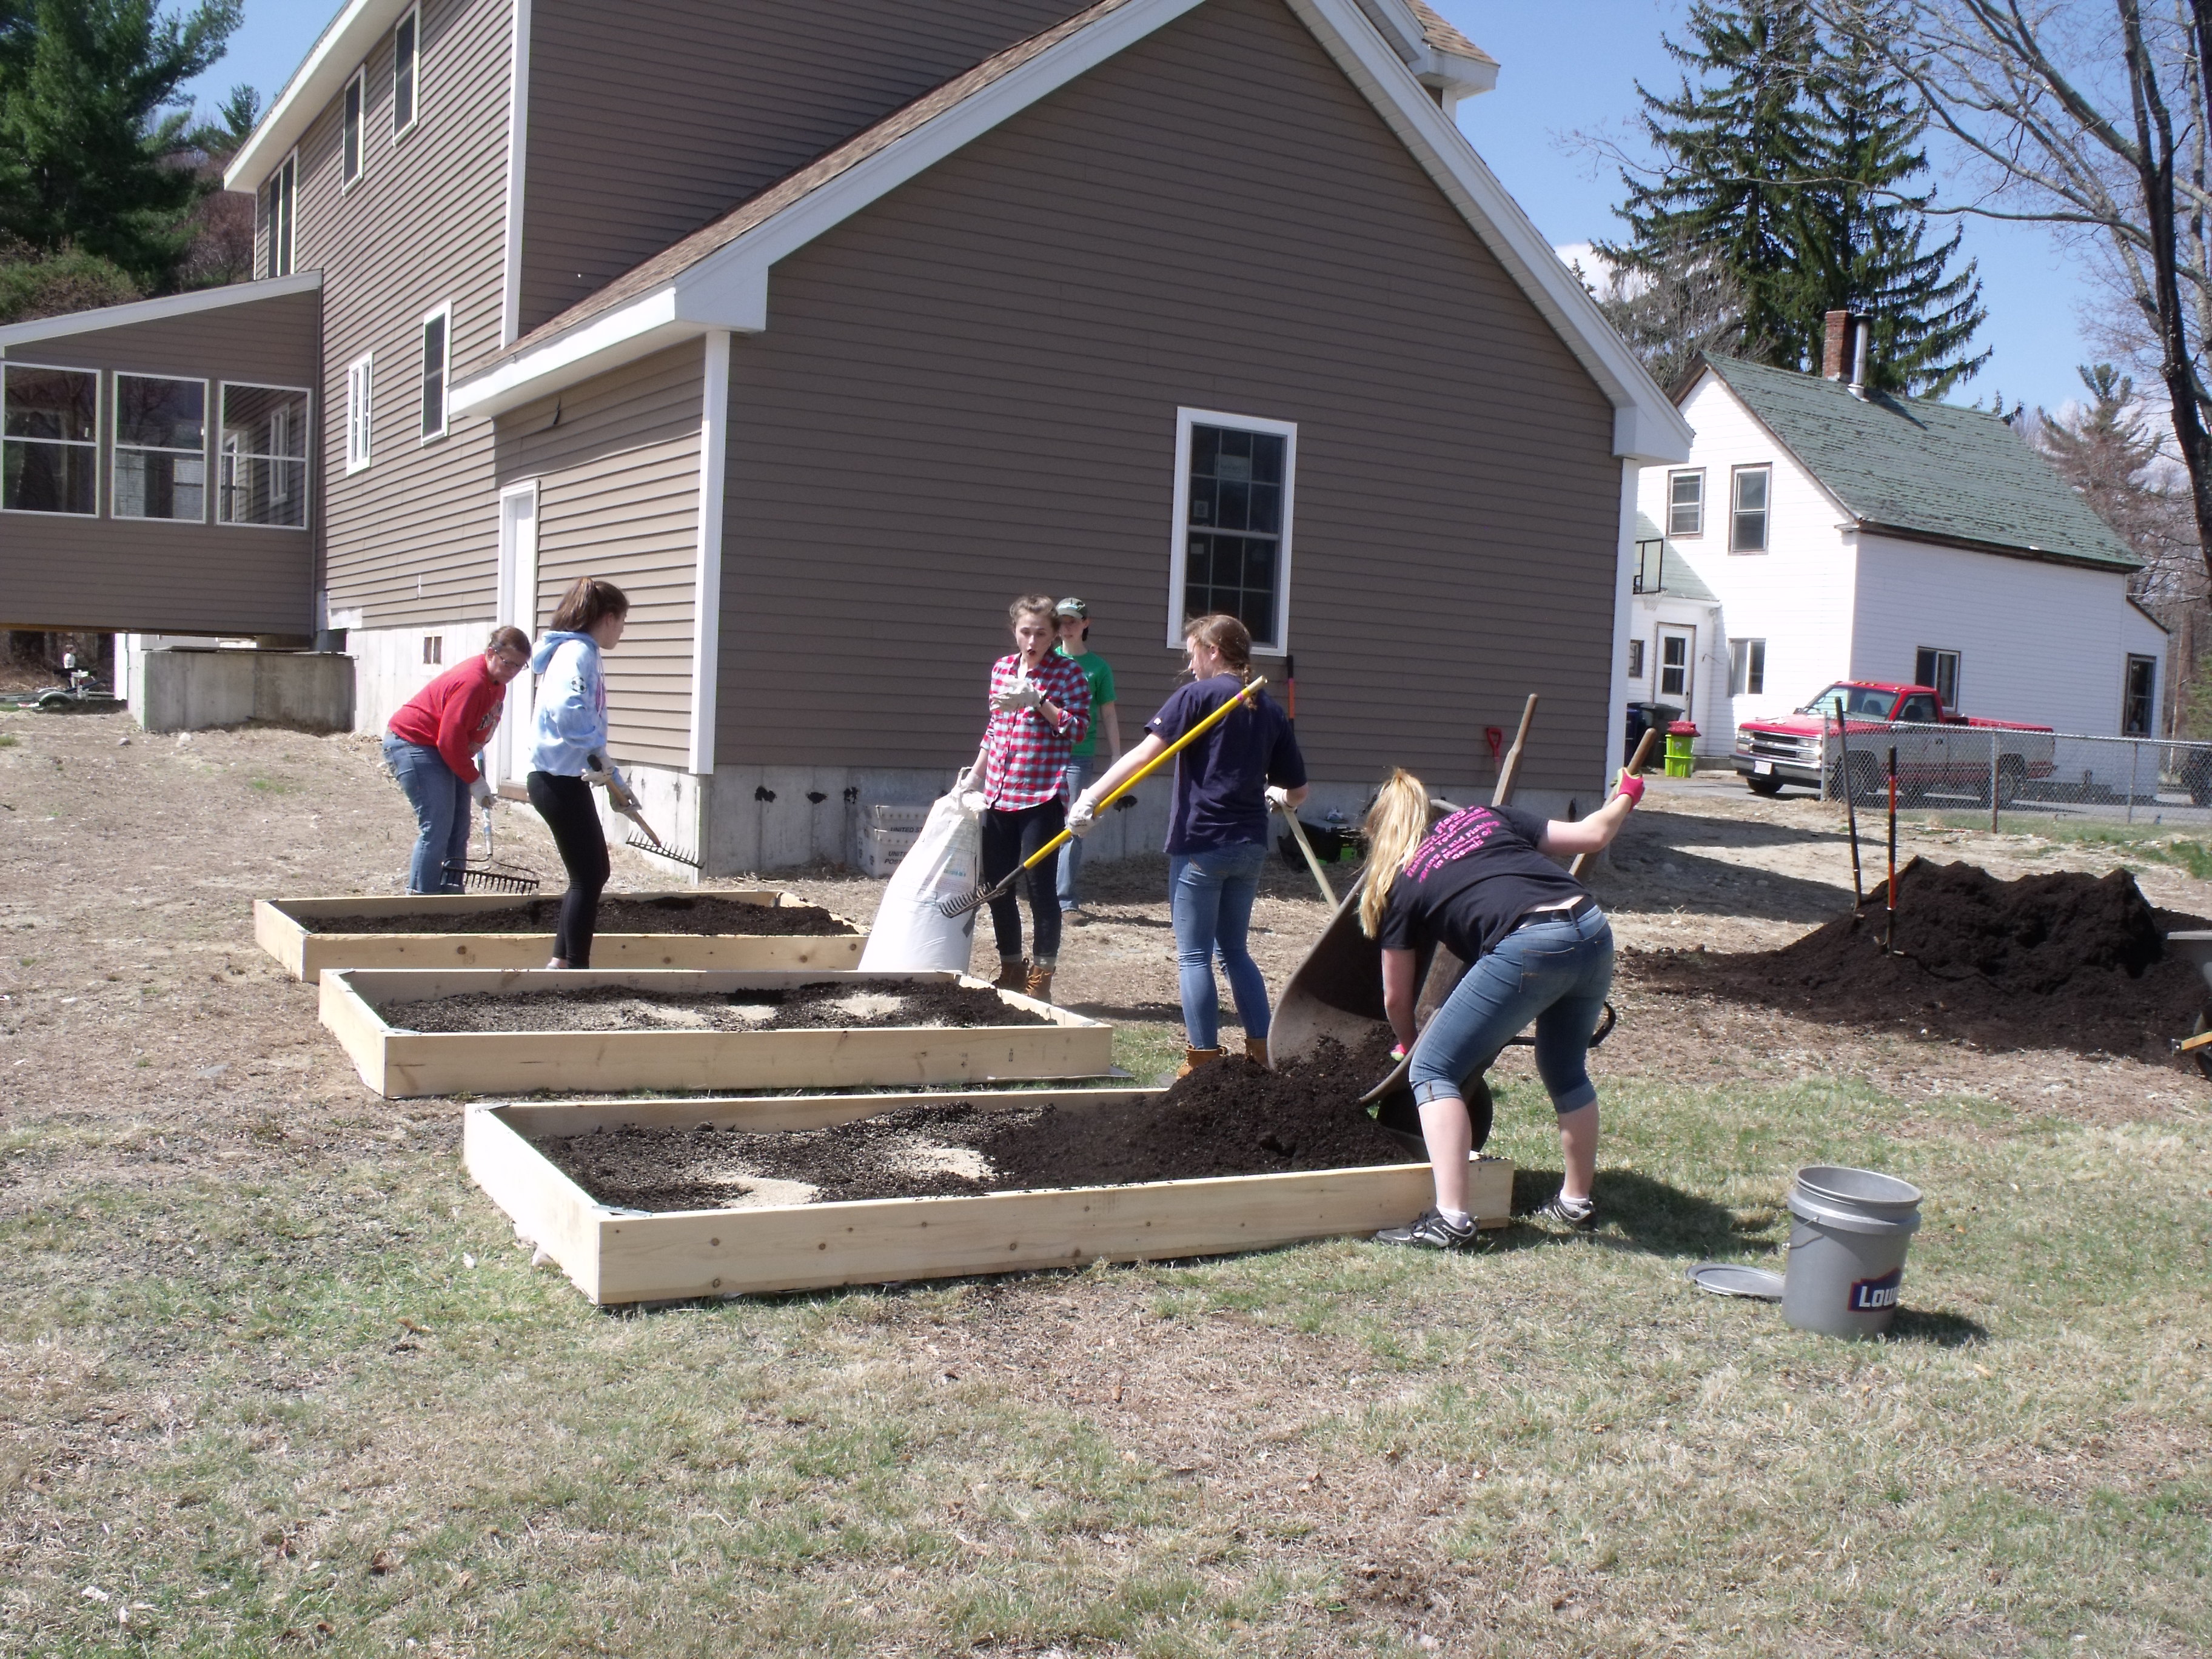
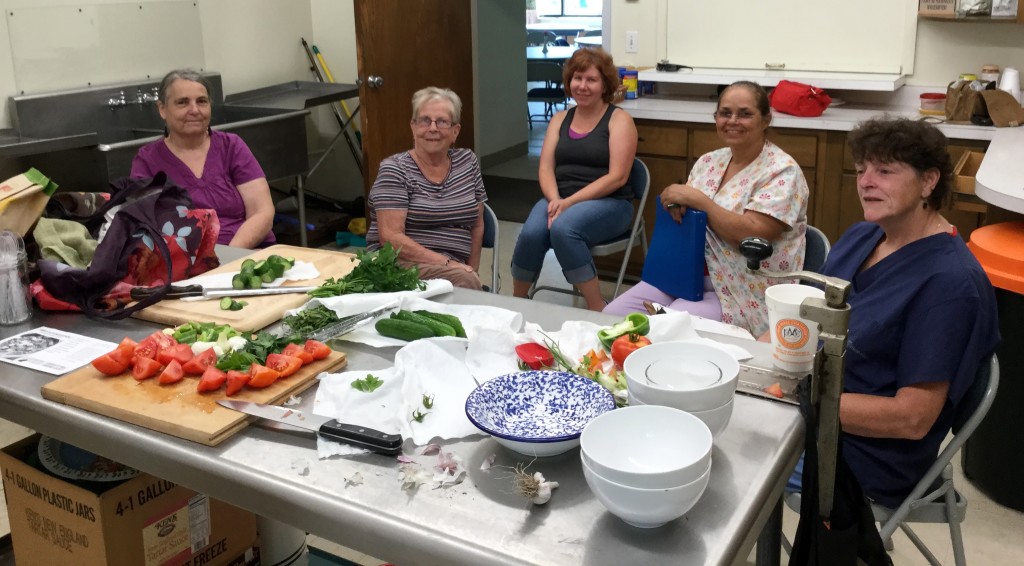
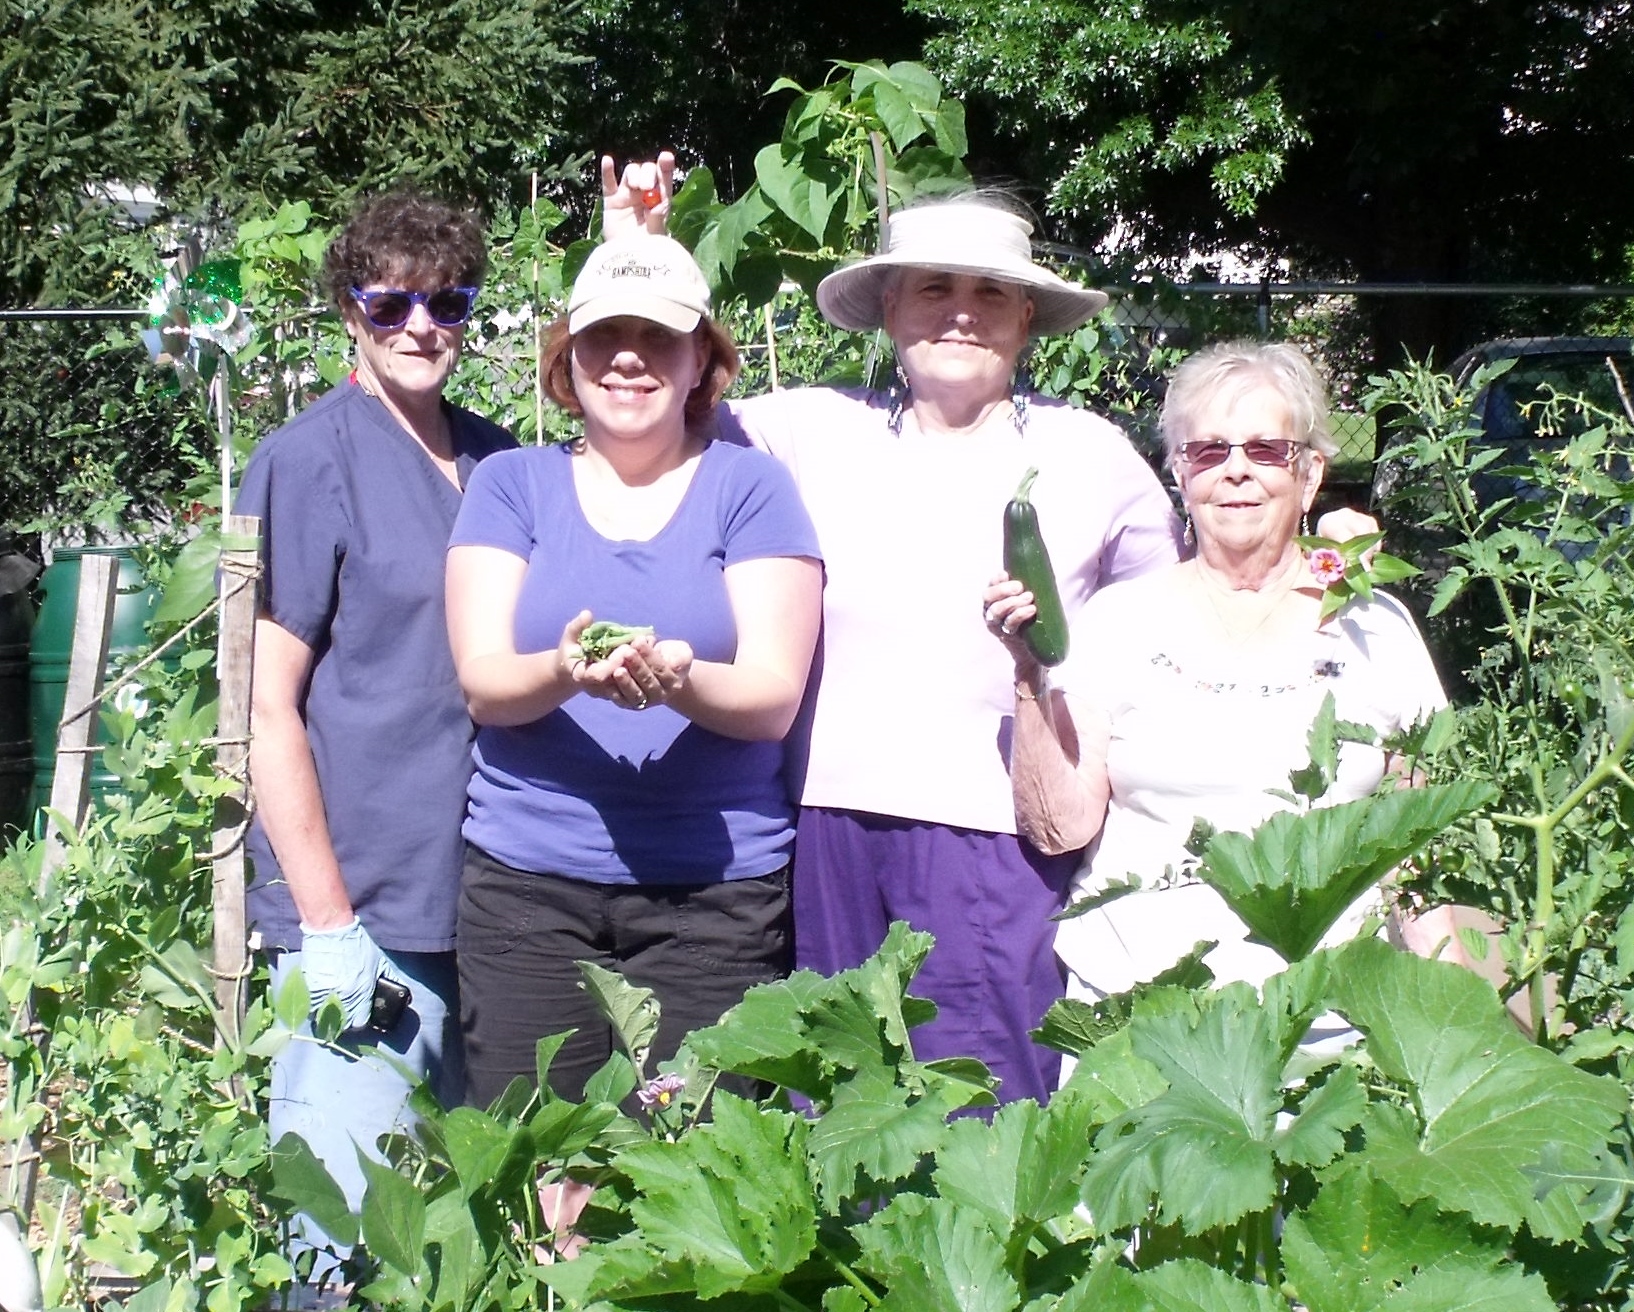
We thought we’d share how everything is doing in our Teaching Gardens now that we’re halfway through our season. Compare with your own gardens and let us know if you’re having similar luck (or misfortune) in your neck of the woods!

leaf miner eggs (2)
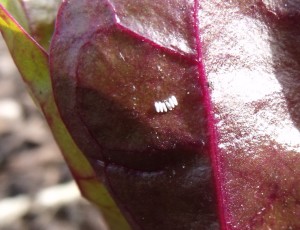
BEETS– Eeks. Do we have to start with them? Leaf miner has been making a steady meal of the greens, despite our best efforts to squish the little white egg sacks on the leaf undersides. Our greens are also not especially green; they’ve gone reddish purple (and, no, they’re not a purple-leaf variety). Phosphorous deficiency? The wrong pH for beets, which prefer between 6.0 and 7.0? We’ll be soil testing in the fall to pin down the culprit.

DSCF5055

BROCCOLI – Our broccoli definitely suffered from the early heat and did not produce well for us at all this year, with the exception of these beauties that came out of our Clinton site. They were among the earliest planted and seem to have gotten the timing just right.

WINTER SQUASH –  The Butternut vines have shot out in the last two weeks and are now making their way down the aisles in healthy, green swaths.

DSCF5143

CARROTS – Ours are growing very well (despite most of our staff and Gurus insisting that they never have luck in their own gardens), but most of the roots are still dime-size in diameter – too early to harvest just yet. Except for our Teaching Gardener Maria’s carrots, which are downright amazing and got a round of applause last class.

CILANTRO – Always a polarizing crop! It’s growing well and our gardeners are either harvesting it happily or trying to give it away as quick as they can.

CUCUMBERS – They’re vining their way up our trellises and flowering – no fruit visible yet.

EGGPLANT – The largest our gardeners have is roughly the size of a golf ball, but the plants are hale and more pollinated flowers are obvious, so we have high hopes for a good year for eggplant.

GREEN BEANS – We’re elbow-deep in the harvest right now, but can’t wait to get the bean-beetle fodder out, out, out! Fortunately, most of the bean beetle damage occurred too recently to have inhibited the plants’ production. Still, next year, we’re considering using row cover for added protection against the pests.

GREENS – Our greens have almost uniformly begun to bolt. The July heat is too much for them so we’ve been scrambling to harvest what’s still useable and screwing up our faces as we taste test the arugula that’s gone by.

KALE – Yep. It’s growing. Slow. And. Steady.

ONIONS – Patience! If you want your onions to grow to their full potential, it’s not quite time to harvest. Ours are looking stellar this year and it’s been a test of patience not to pull them all out right this minute, but we’re waiting for the greens to brown and dry before we begin curing and harvesting.

PEPPERS – These caught us by surprise by maturing so quickly; we’re already harvesting beautiful bell peppers and flawless green jalapenos. Keep ‘em coming!

RADISHES – In all three Teaching Gardens, we’ve had our first envy-inspiring crop. If folks hadn’t planted radishes to start, the colorful harvest of their peers has inspired them to give them a try because, really, what’s more fun than pulling up glittering ruby root crops?

DSCF5132
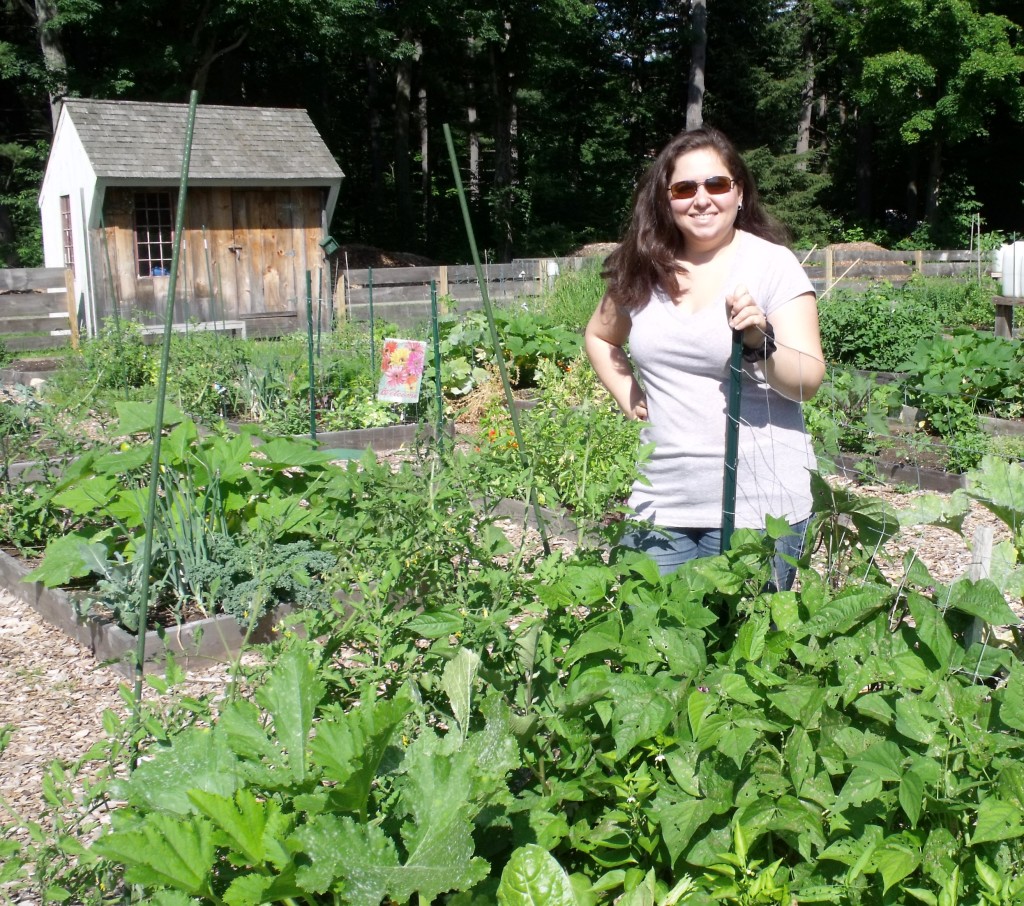
SQUASH – It’s that time of the season. The zucchini and summer squash have begun producing and the recipes for using them up have begun to dot our Teaching Garden conversations.

Our zuke obsession of the moment? Easy squash pancakes: 1 grated zucchini, 2 tbsps. thinly sliced scallions, 1 large egg, 4 tbsps. all purpose flour, ½ tsp. baking powder, salt and pepper. Stir and spoon into a buttered/oiled large fry pan over medium heat. You’ll get 5 zucchini medallions in just a few minutes. They’re great topped with Green yogurt or sour cream.

Sadly, in Leominster, powdery mildew is making itsway through the Teaching Garden beds thanks to a heavy infestation in a neighboring plot. We continuously prune the most affected leaves to prolong our plants’ lives and get as much production as we can, but once present, powdery mildew cannot be “cured.” We’ll spray with a milk mixture (1 part milk to 9 parts water) to slow the progression and hope for the best.

TOMATOES – The excitement is palpable in our classes where everyone is closely monitoring the ripening of their (and their neighbors’) tomatoes. Most have had one or two cherries so far, but we haven’t seen a fully ripe beefsteak just yet. Still, we daydream….stuffed tomatoes….BLTs…caprese salads….mmmm….

2015-06-30 07.03.34
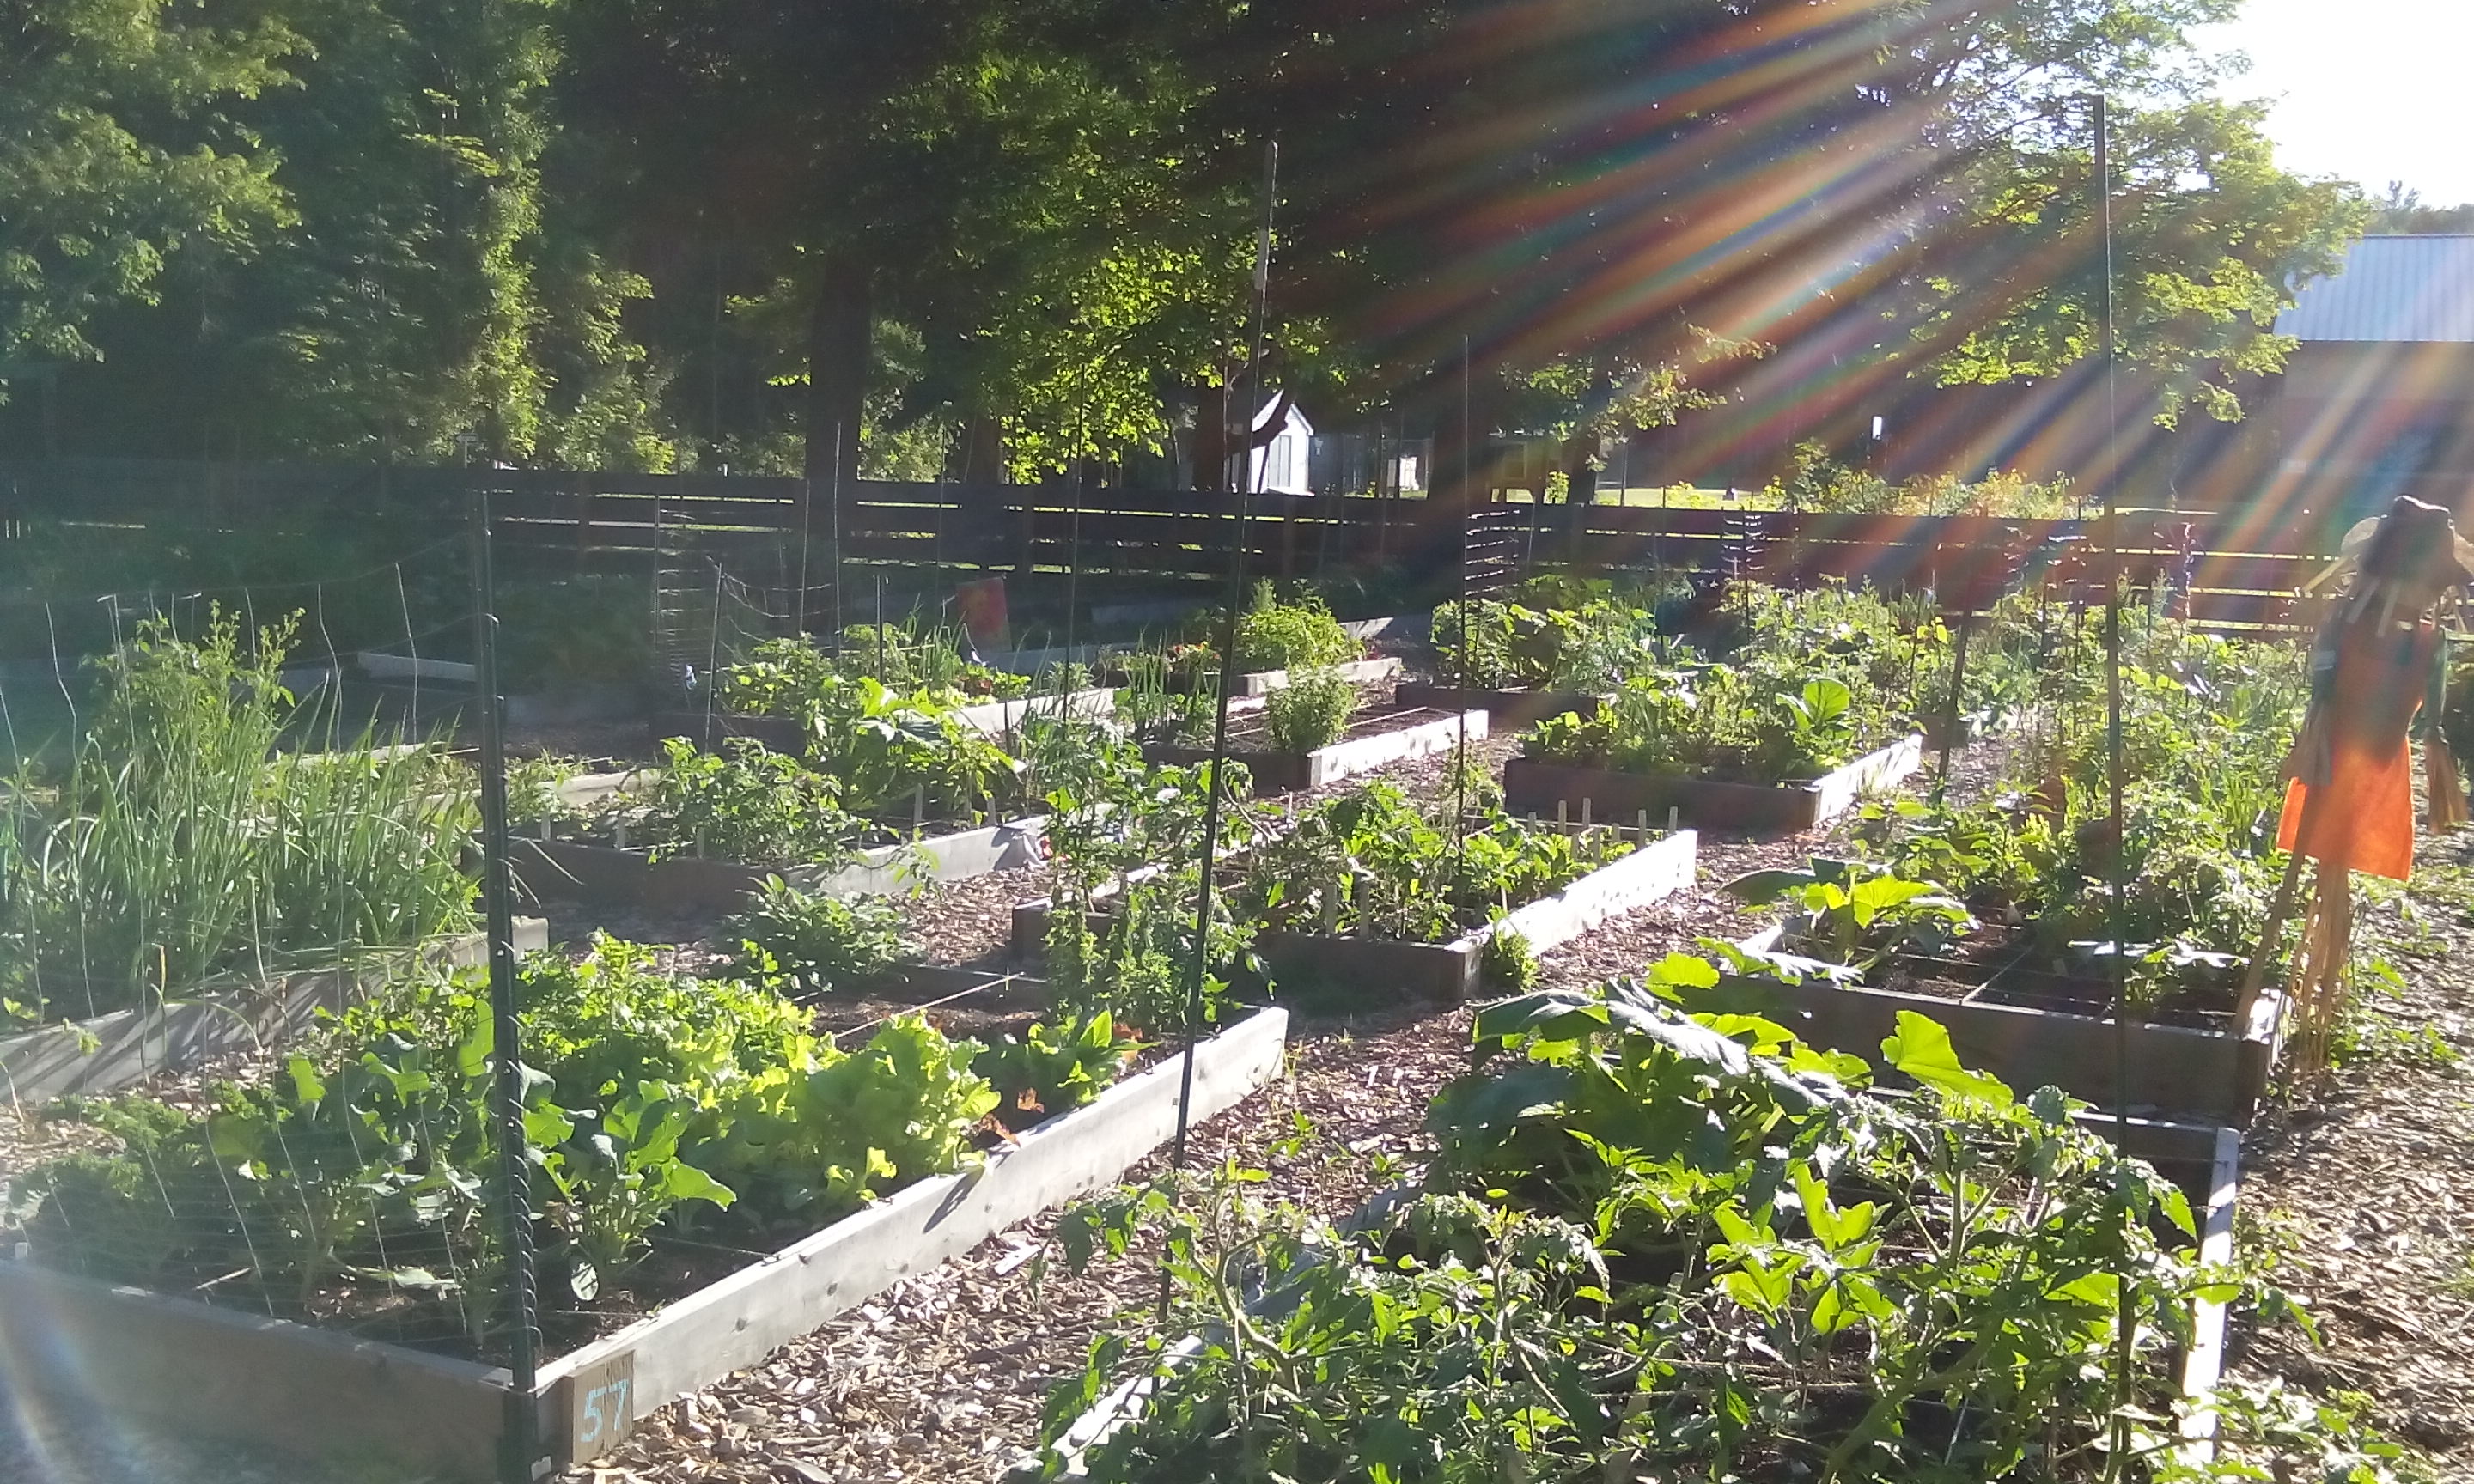
And that’s what’s growing in our Teaching Gardens! Let us know what you’re seeing in your own plots and we’ll keep you posted as the harvest continues. Happy gardening!

Garlic Scape Pesto

At GP, we are not professional chefs. We’re gardeners through and through. That being said, being a gardener naturally lends itself to improving your skills in the kitchen. It happens out of necessity more than anything; the onslaught of fresh produce can be overwhelming at this time of the year if you don’t have a few recipes up your sleeves to help you make use of it all in short order.

In general, some crops are easier to manage than others, namely, those which have become familiar stars in American fare, like potatoes, tomatoes and peppers. We’re sure you can think of plenty of recipes you already make that feature these tasty nightshade family members, but there’s so much more to be grown in the garden!

In our Teaching Garden, we host monthly Garden-to-Table cooking classes to tackle not just seasonal produce, but the unfamiliar crop. You know, the one you probably wouldn’t grow in your garden because you’re just not sure what you’d do with it if it happened to produce really well? Yeah, that one. Our goal is for everyone to leave class not only having tried a new dish, but feeling excited to include that crop in next year’s garden plan.

Enter garlic scapes.

garlic scapes_credit Rebecca Siegel

 (Photo credit: Rebecca Siegel)

If in looking at this picture you’re still not really sure what you’re looking at or which green bit is the actual scape, you’re not alone. You won’t find these tasty delicacies in the supermarket, or even at your average farmer’s market, so many of our gardeners and volunteers have never heard of them, let alone seen and tasted them.

hard_neck_garlic
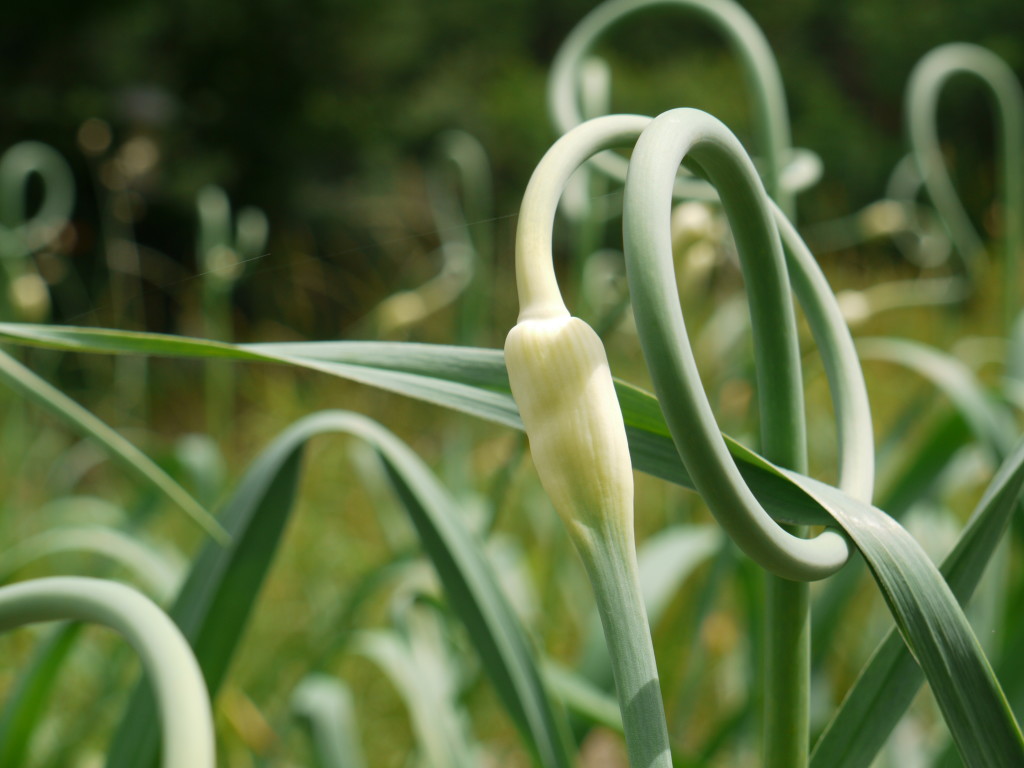
A scape is the flower stalk of the maturing garlic bulb. It begins as a straight stem, bends into a marked curlicue in early July, and then, as it prepares to open, straightens out again. In its early stages, the scape is most tender and ideal for harvest. Once the stem straightens out the second time, it becomes tougher, woody, and less desirable. The full harvest season lasts only a few weeks, so keep an eye on them or you’ll miss it!

So what can you do with garlic scapes? To start, they can be used as a substitute for garlic cloves in any recipe. Keep in mind, their flavor is milder than the bulb, so you’ll want to use a bit more to maintain that garlicky kick. They’re also great dressed simply, sauteed in olive oil, salt and pepper, added to an omelet, or included in a stir-fry.

If you find yourself growing a lot of garlic and you have a dozen or so scapes on hand, we strongly recommend you try our version of garlic scape pesto, the star of our most recent Garden-to-Table cooking classes.  The preparation is very simple and, because it only uses a few measuring spoons/cups, the clean up is, too. Like garlic itself, this pesto is endlessly versatile. We like it as is with good quality bread, but it adds great flavor to cooked dishes like pasta, chicken or pizza.

Garlic Scape Pesto

10-12 garlic scapes, chopped

1/3 cup sunflower seeds (can be raw or roasted, but always unsalted)

1/3 cup finely grated Parmigiano-Reggiano cheese (or your favorite aged cheese, like Parmesan or Asiago)

1/4 tsp. salt

1/4 tsp. pepper

1/3 cup olive oil

In a food processor, puree the garlic scapes, sunflower seeds, cheese, salt and pepper until very finely chopped. With the motor running, slowly add the oil. Taste and season with additional salt and pepper as needed. (Note: Homemade pesto keeps in the fridge, covered, for up to 1 week or frozen for up to a month.)

Support your Tomatoes!

251991_4291916541833_1876240521_n - Copy

Tomatoes are often the most-prized plant in the garden; the succulence and sweetness of home-grown tomatoes just can’t be found in the grocery store. However, these vines call for more attention and devotion than many other crops. Specifically, most tomato plants require continual staking and pruning, called suckering, to reach their full potential.

Staking Tomatoes

There’s nothing worse than seeing a tomato eaten away by bugs just because it was touching the ground! If tomato plants are not held up, they become highly vulnerable to the damaging effects of bugs and disease. Many different methods exist for supporting tomato plants. Below are a few common techniques and the benefits and drawbacks of each.

The “Cage” Method

Tomato cages are often metal structures placed around each individual tomato plant. The primary benefit of using cages is that you only have to place the cage around once. This saves time in comparison to other methods in which you continually have to tie tomatoes as the plants mature. However, cages are expensive relative to other methods and can make access to the entire tomato plant – along with suckering and harvesting – more difficult because the center of the plant becomes hidden from view.

How to Use Your Cage: Bend the pointed ends outward before pressing into the ground with the tomato transplant neatly inside. Support further with a stake positioned just inside the topmost rung. This will help keep the cage in place.

The Individual Stake Method 

This method requires some kind of stake for each individual tomato plant. You can use stakes specifically designed for the job or improvise with a tall sturdy sapling, old broomstick handle, unused ski pole or just about any straight, strong pole. Tomato tie
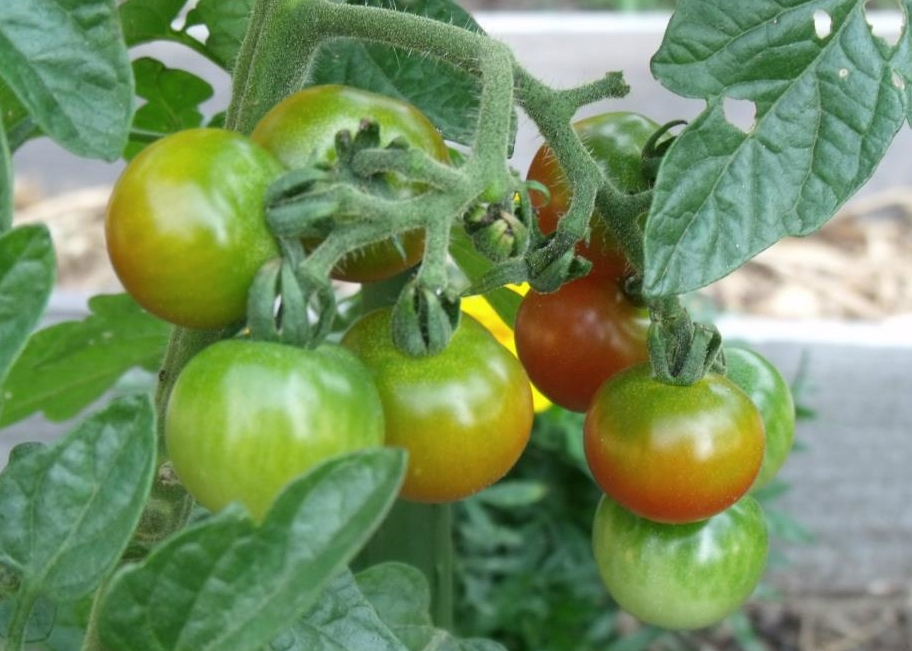
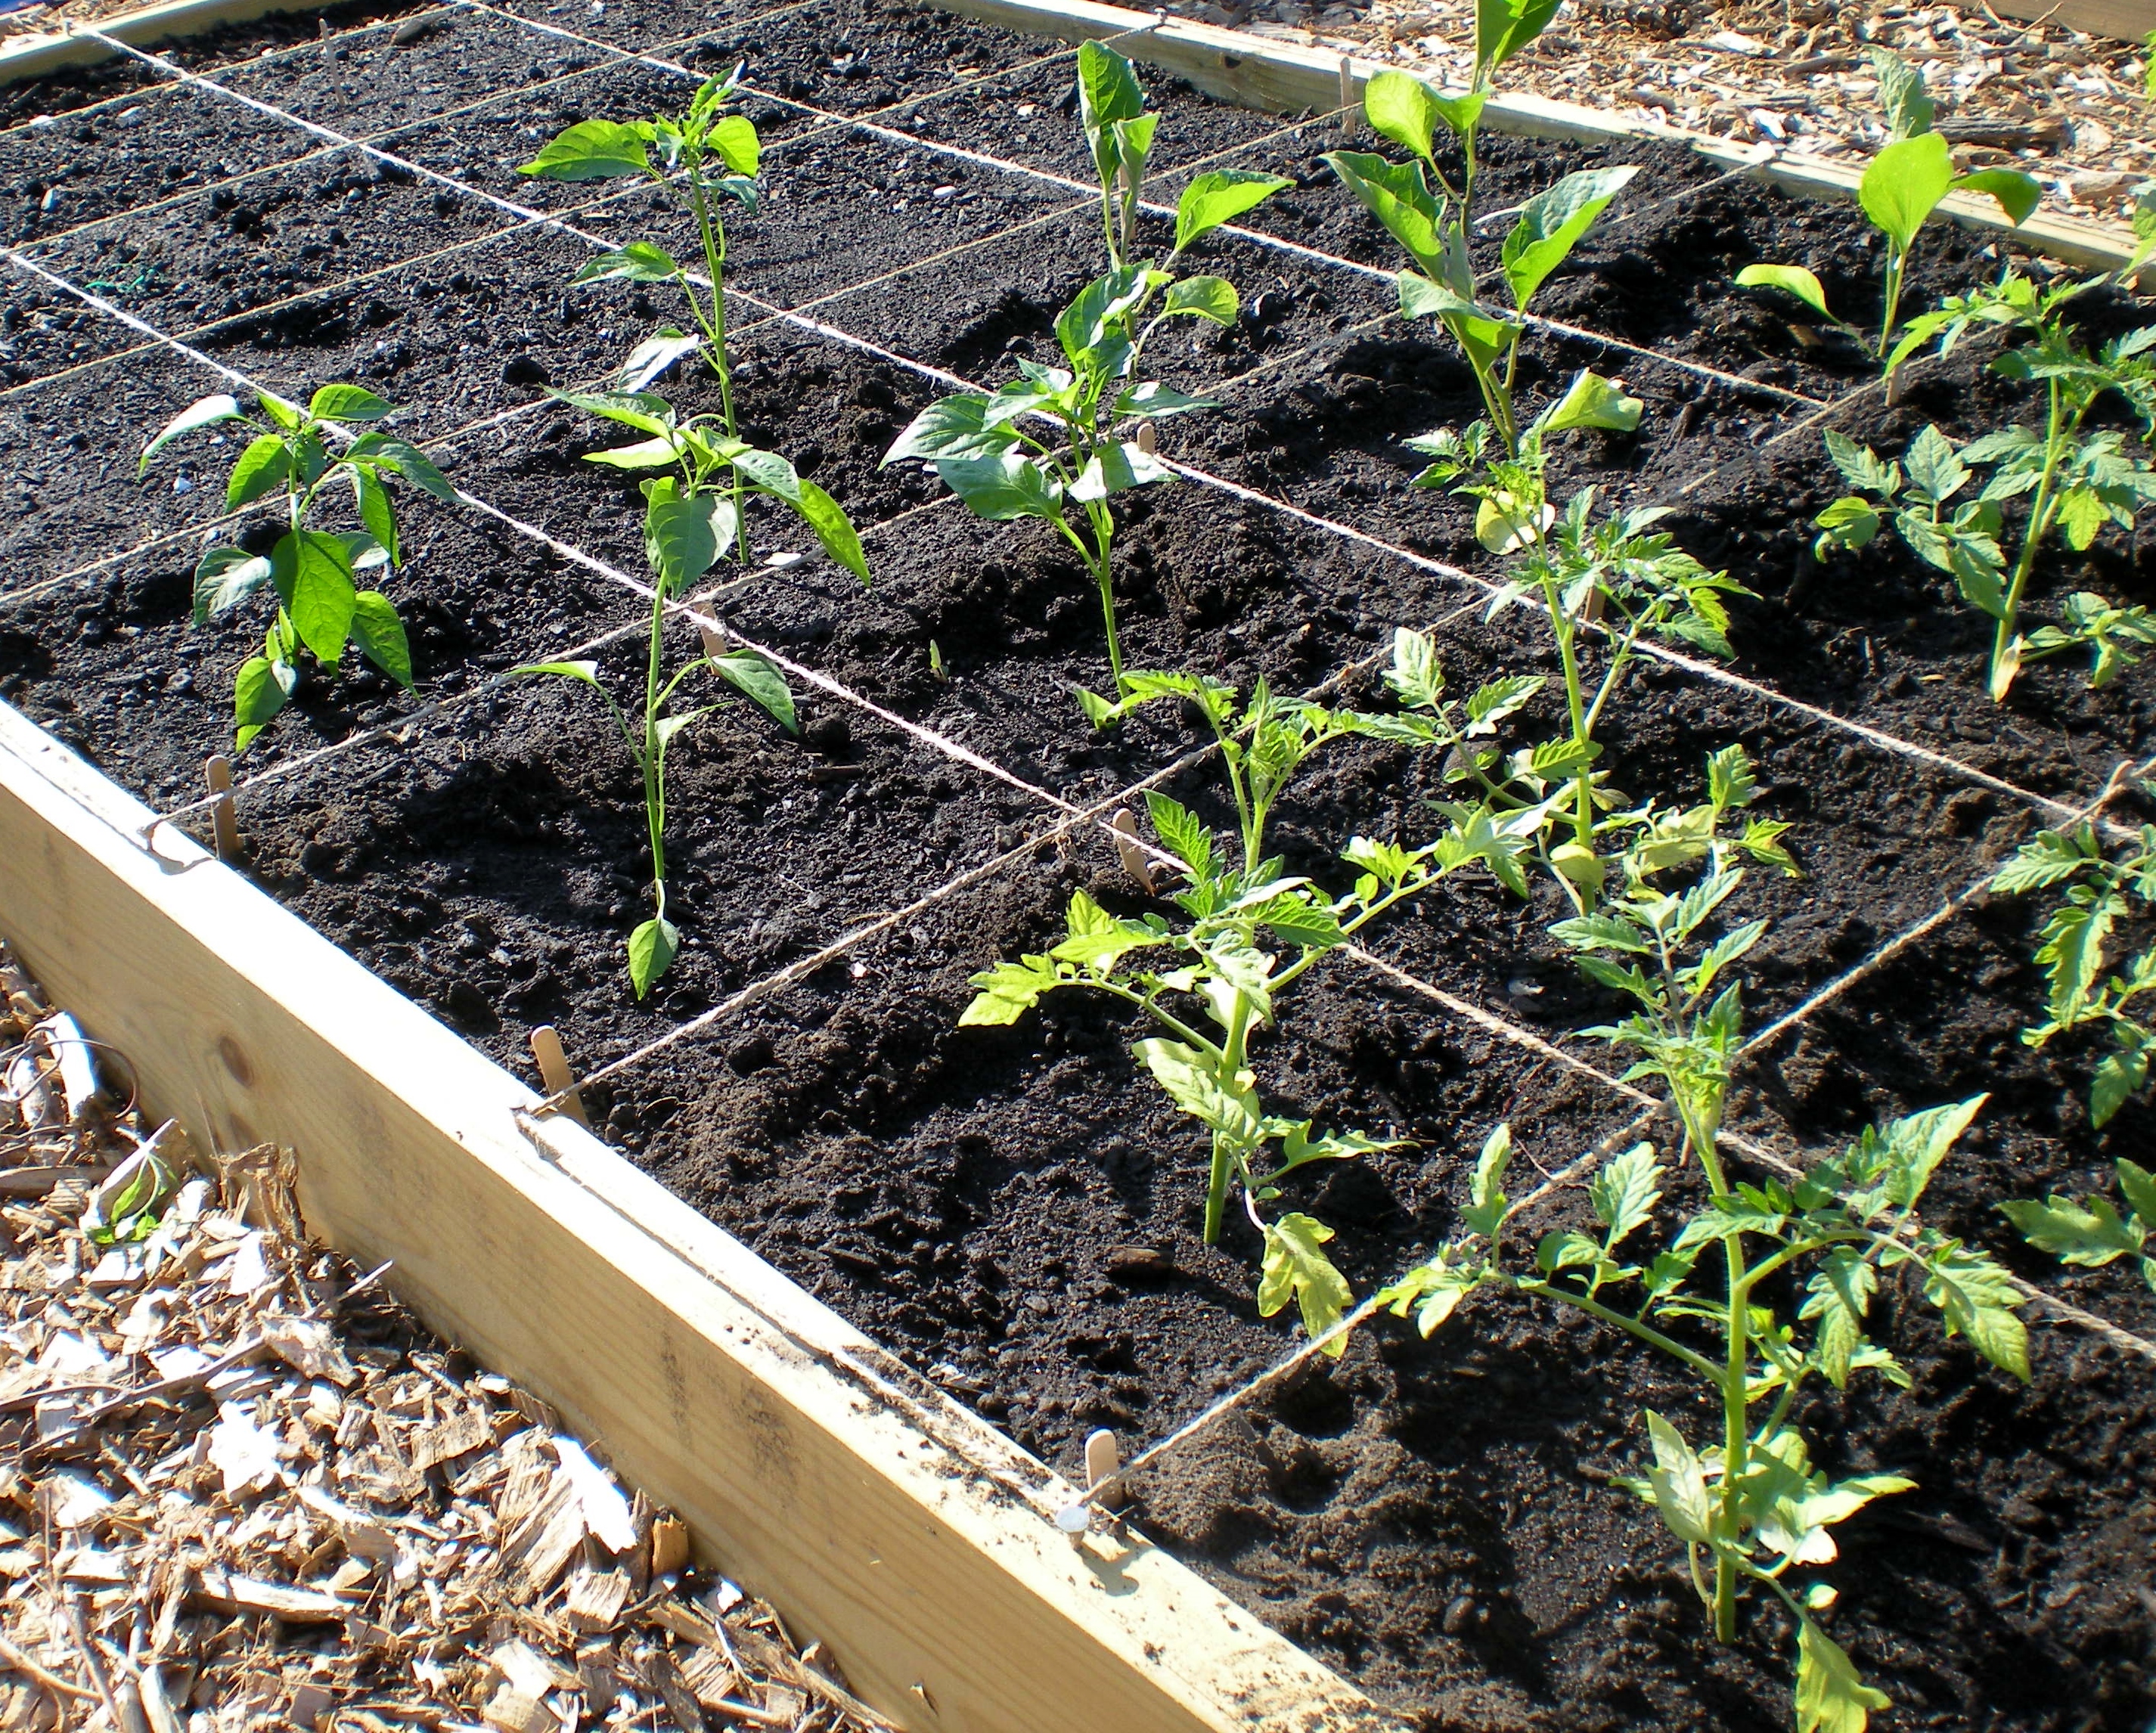
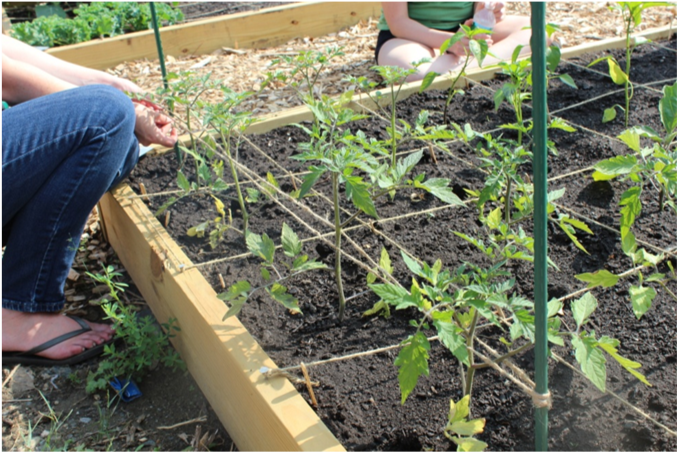
We use metal poles in our teaching gardens because wooden poles have the capacity to carry tomato blight (a devastating disease) from previous seasons. In contrast, metal poles may be reused for eons!

How to Use Your Stakes: Begin by inserting the stake as deep as possible into the soil, about 3-5 inches away from the base of the plant. Use a hammer or rubber mallet to drive the stake firmly into the ground. As the plant grows, tie a strip of old rag, panty hose, string or twine tightly around the stake and loosely around the main stem in a figure eight fashion. The stem needs to remain about 1 inch or more from the stake. If you tie the plant stem too tightly to the stake, the tomato will not be able to grow properly.

The “Florida Weave” Method

The Florida Weave method is used to support multiple tomato vines in a row with a weave of twine running between two strong end posts. This method provides easy access to each tomato plant for suckering and harvesting, is the least expensive option, and is also reasonably quick in comparison to individual stakes.

We selected this method for use in our own Teaching Gardens this season and, so far, have been pleased with the results! Our one suggestion: use sturdy end posts and be sure they are firmly in the ground as the weight of the mature tomato plants will slowly pull the stakes toward each other. We used narrow metal posts because they don’t harbor blight from season to season, but for this method, thicker wooden stakes might be the better bet.

How to Do the “Florida Weave” Method: This method sounds complex in writing, but we promise it’s simple in practice, so don’t be put off by the number of steps to get things started. Once the posts are in place, the weave is very simple to maintain.

weave

Begin by inserting a stake as deep as possible into the soil, about 3-5 inches away from the base of the tomato plant at the beginning of your row. Use a hammer or rubber mallet to pound the stake into the ground. Repeat this process for the tomato plant at the end of the row. Take your ball of twine or string and tie a knot to secure it to the stake. Grip the twine and “weave” it behind your first tomato plant, in front of your second tomato plant, behind your third tomato plant, and so on. When finished, tie the twine to the second pole. Repeat the process starting from the other post. When you’ve completed the process, your tomato plants should be enclosed by figure eights. As the plants mature, continue to string twine every 6-8″ to provide additional support.

Stake early, support often

Whichever method you choose, supporting your tomatoes as early as possible, preferably within a week or two of transplanting, will make life easier on you. The longer you wait, the more unruly your tomatoes will become and the more difficult the tying or caging process will be. If you choose to stake your tomatoes, continue to add support every time the plants have grown about 6 to 8″ to keep them in line.


Suckering Tomatoes

What is a sucker? 

While not absolutely necessary, pruning tomato plants can maximize the number, size and flavor of your tomatoes. During their first several weeks in the garden, before blossoms emerge, tomato plants put their energy into growing new leaves and extra branches to hold those leaves. These side stems grow directly off the main stem. Suckers are new branches that grow out of tTomato Sucker
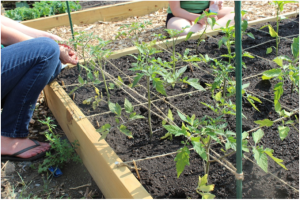
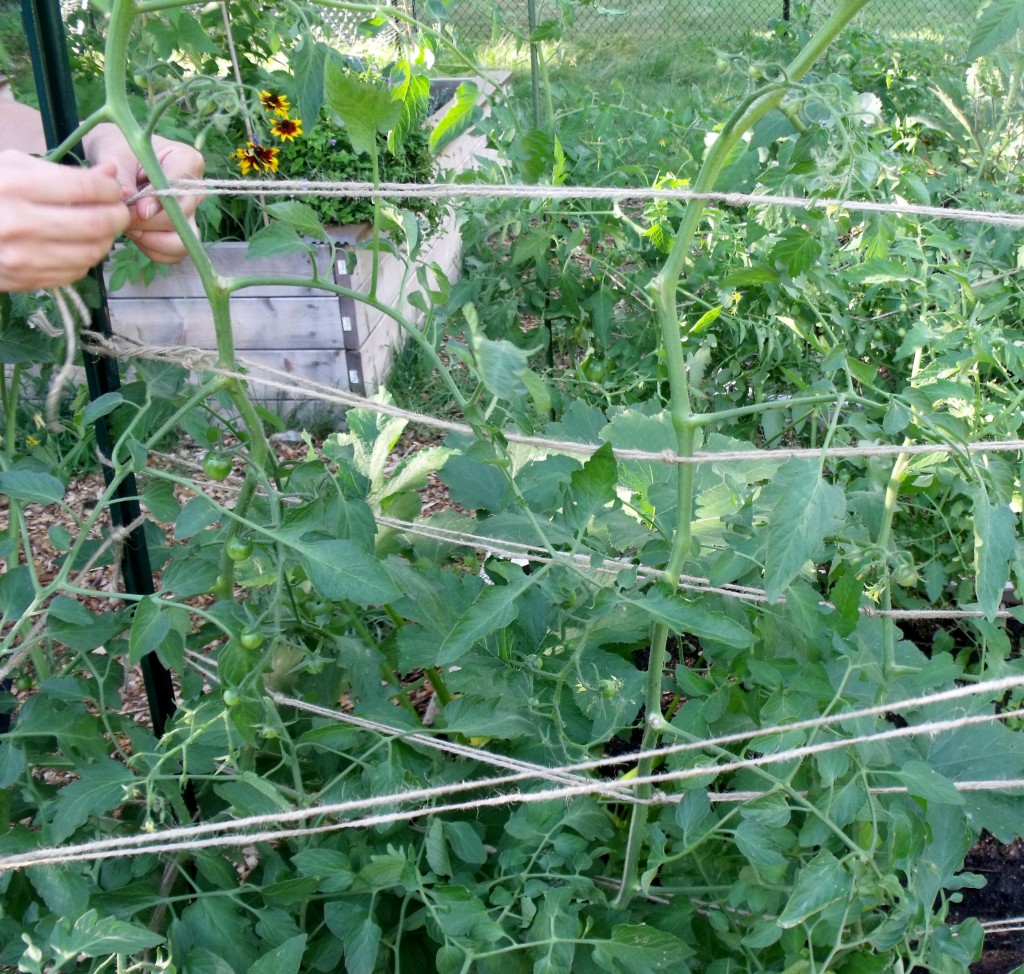
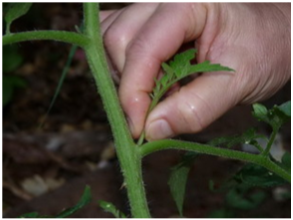
he tomato’s main stem, just above a side stem (in the “crotch”). A tomato plant will produce suckers throughout the growing season.

Why prune suckers? 

Although it requires a bit of extra work, removing the suckers from your plants is beneficial in several different ways.

Earlier production. Fewer stems on the plant means more of the plant’s energy will go into producing fruit rather than growing stems and leaves, ultimately resulting in an earlier harvest.

Larger, healthier fruit. Overgrowth often results in the plant producing its own shade. Less sun reaching the leaves means less energy produced and available for fruit growth. Suckering ensures the maximum amount of sun reaches the leaves, is converted into energy and produces large, healthy tomatoes.

Disease prevention. Dense leaf growth can trap excess moisture and promote the spread of disease. Pruning alleviates this and allows for air to circulate around the plant.

How do you prune suckers?

Pruning suckers is best done when the shoots are as small and vulnerable as possible. Carefully grasp the base of the sucker and pinch it between your thumb and forefinger. This method is preferable to clipping or slicing as it results in a smaller wound on the plant that will heal more quickly. However, if a sucker has gotten away from you and grown too large to pinch easily, a clean cut with a sharp blade is better than a ragged wound created by wrenching and twisting off a branch.

Much to our dismay, a sucker once pruned is NOT gone forever! Tomatoes will often continue to produce additional suckers in the same stem-branch joint, so keep your eyes peeled and your pruners ready!

So go to it, Gardeners. Stake early, support often, prune with vigilance, and you’ll have prize-wining tomatoes before the summer is through!

Darlene Spencer_(16)_prize-winning tomatoes_9-12-13_JO